Preparation
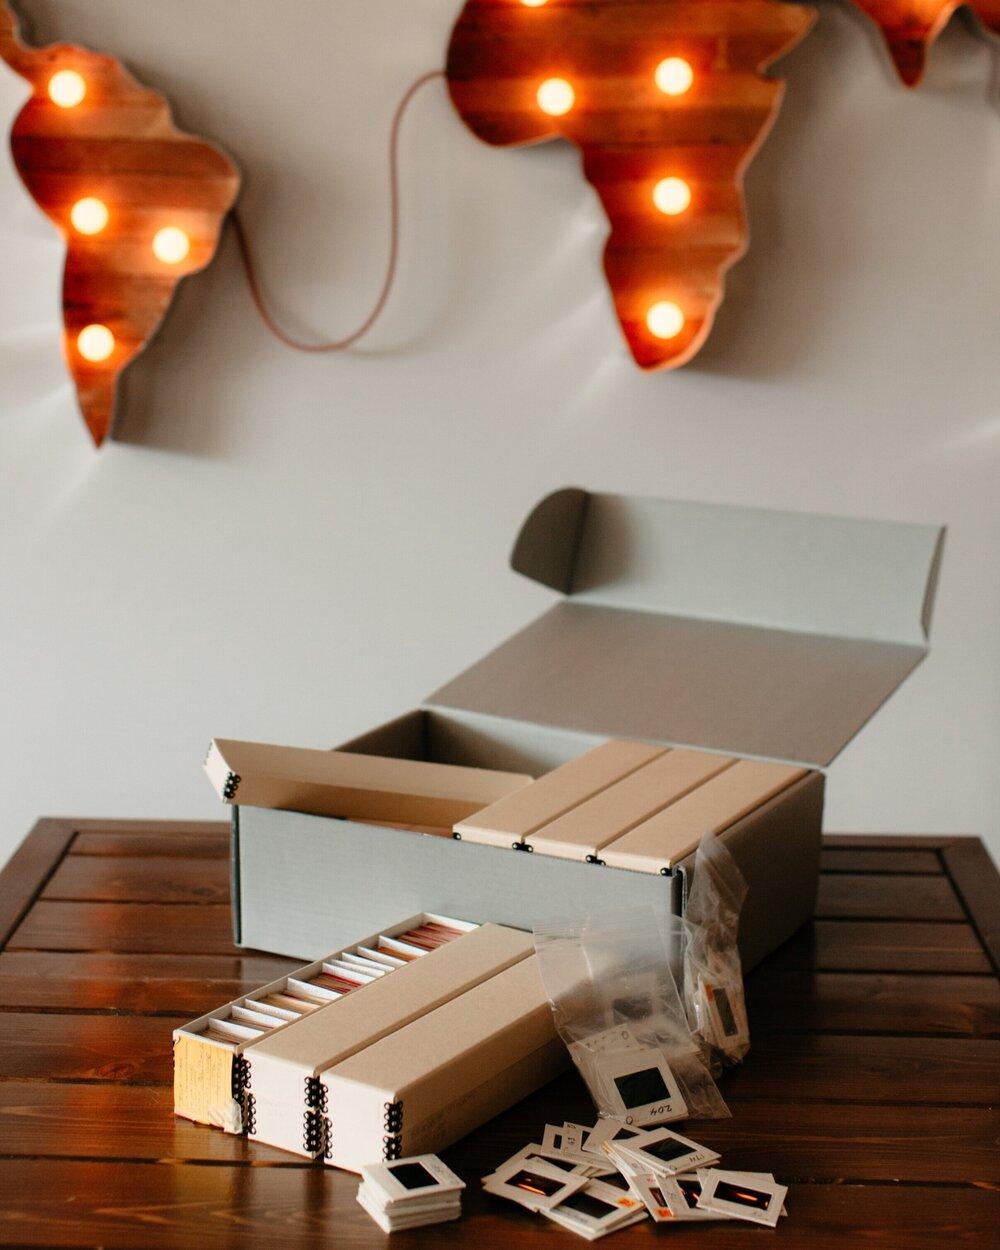
This will be the most difficult part of the family photo project. Whether you inherited a meticulously categorized slide collection or a cardboard box of randomized prints, this process will streamline both scanning and preparing your images for storage later.
Give yourself time and space. This is a project that at times will feel overwhelming. Slow down, find the joy and novelty in it, share images with family members as you discover them, send them to your older relatives and ask for the story behind them. These are but a conversation starter. It’s a way to preserve your legacy that has been formed over decades, it will take time to complete.
You may want to hire an archivist (I am not one) to guide you through this as well.
Let’s simplify the process into three steps.
-
Separate your images by type. Print (including photographs, postcards, letters, cards, newspaper announcements, autograph books etc.), slide (colour positive film images that look lifelike to the eye), and negative (black and white or colour film that needs to be inverted to be easily discernible).
-
Determine the best organizational method. This is entirely dependent on your personal family photo collection. By year is my most highly recommended, however, perhaps decade, family unit, or event may be more manageable.
-
Preparing the images and sorting for scanning. Now it is time to remove your images from albums (or not), itemizing them by the organization method previously decided upon, adding the size of print as a factor, and removing images that aren’t contributing to the overall narrative of your family collection.
It sounds easy, but just know heading into the process that you’ll need to bend a few rules here and there, that no organization method is perfect, and that as you work through the imagery your familiarity with the pieces will be useful for archiving the images both digitally and physically.
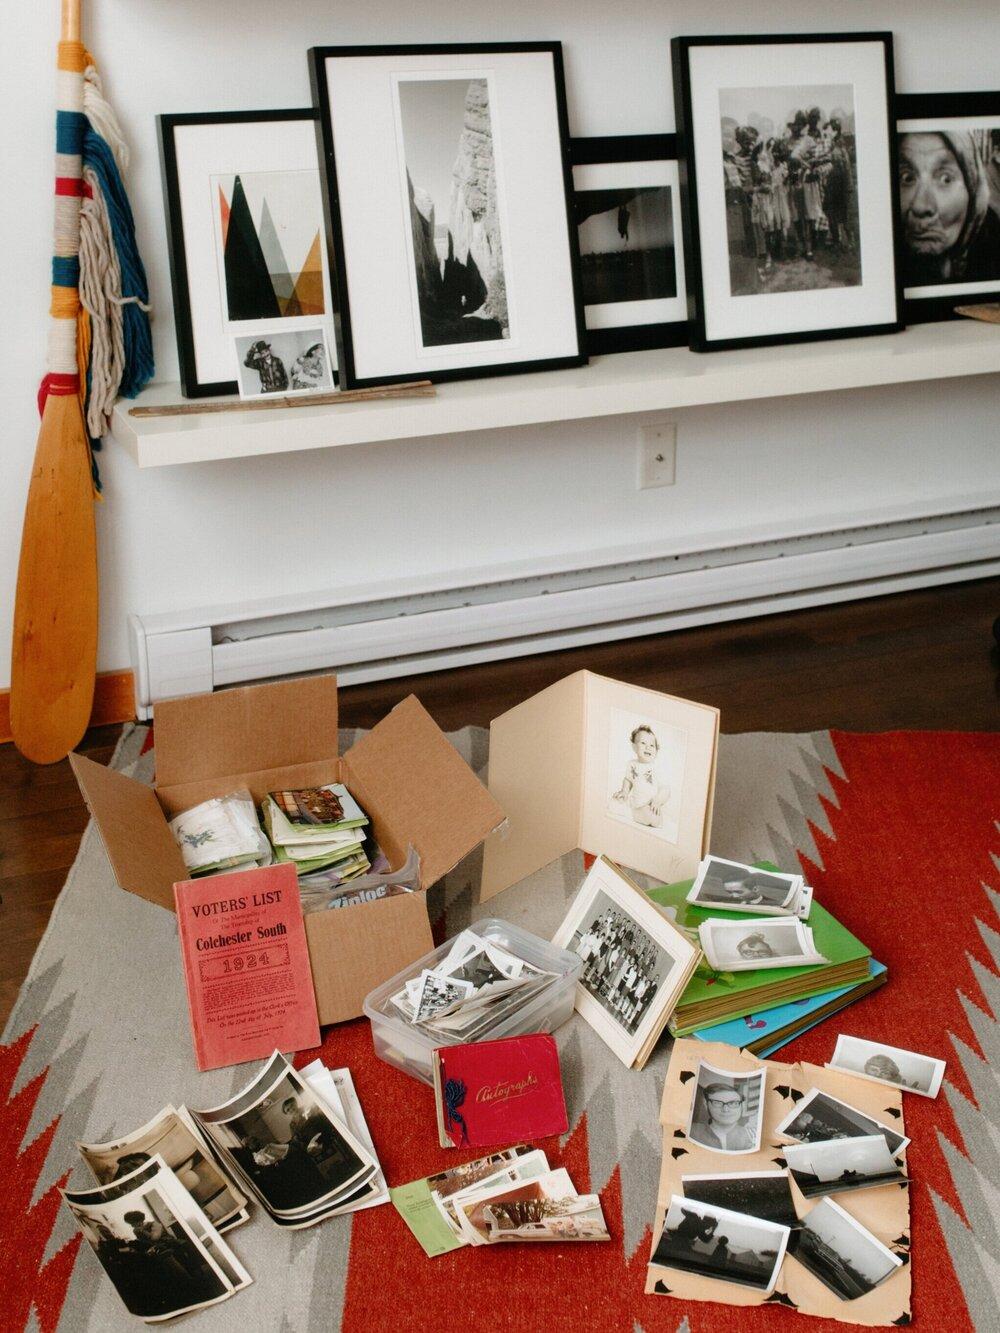
Perhaps 5% of the collection I inherited. A randomosity of photo albums, formal family and school photos, darkroom experiments, and slide carousels, dating from the late 1920s to the late 1990s.
Tools
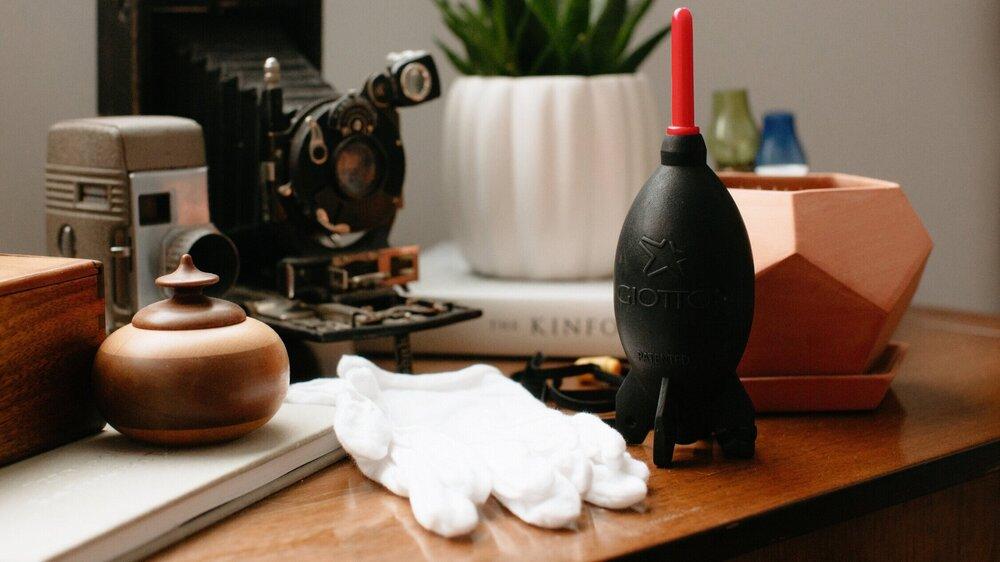
Before we get started let’s talk tools to have on hand. For safely handing photographs you should be wearing gloves. Your hands have oils that will leave traces on your photographs – you may even notice fingerprints of strangers of old on your images if you look carefully. To preserve the quality of your prints and negatives deteriorating glove up. Nitrile gloves are ideal, however in the times of coronavirus cotton archival-quality gloves will do, although they decrease your dexterity and may leave fibres behind. To combat this, and to provide the best scanning quality later, purchase a handheld air blower. Do not under any circumstances use compressed air on your images. Slides are easiest to remove from their carousel for scanning with a tweezer, never handle the film, and hold onto the mount instead. Lastly, if you have what is commonly referred to as ‘magnetic’ photo albums, or more recognizable as ‘sticky’ adhesive photo albums, purchase flavourless Teflon dental floss to aid in the removal of photographs. If you have a large collection of slides that need to be organized prior to scanning I would recommend purchasing a slide sorter, new or vintage (I use mine as a side table lamp), or a slide viewer.
Types of Images
Prints
It is quite likely that your family collection primarily consists of photographic prints unless you had a photography enthusiast in your lineage who retained the slides or negatives they came from. So we will start there. Amongst them may be newspaper clippings, correspondence, taxes, and certificates amongst other things – while not quite my forte in this field, I find them important to tell a broader and more complete story.
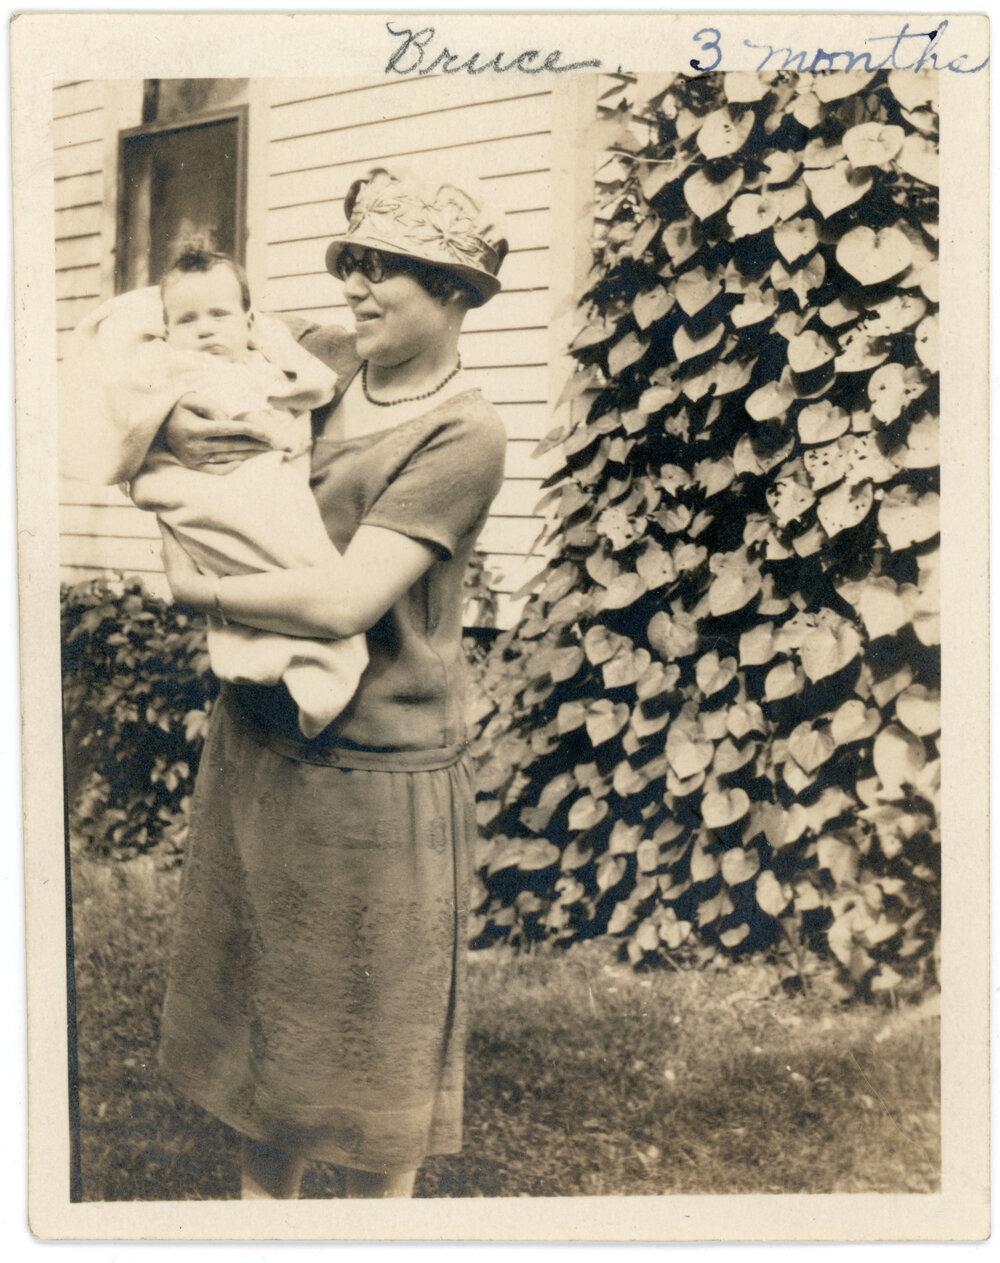
My great grandmother holding my grandfather, Bruce Staddon, in August 1927.
These may come in the form of professionally taken cabinet cards, popular after the 1870s, on which the studio name and sometimes address is commonly stamped (let’s all take a moment to appreciate the branding and the information that provides us on locale and time). Cabinet cards will most likely have a sepia tone, however, may less commonly be black and white.
On the release on the Kodak Brownie, a simple box-like camera made available to the masses, personal snapshots became more common. Chances have it your family archive are the descendants of such cameras that took roll film. Black and white film from the early 1900s, colour slide film more popular following World War II, and colour film (from my experience used commonly after the late 1960s).
From prints alone, you should be able to sort your family archive loosely by decade. Whether you have cabinet cards vs. snapshots, what the fashion of the day was, meticulously kept names and dates on the borders or the back of the print, lab printed dates (note: these are typically when the print was made rather than taken, so it may be several months or years off), or paper type (I’m looking at you ‘70s with your divoty paper and curved borders and ‘90s with your obsession with gloss 4x6s).
Separate your prints from your slides and negatives. Likewise in a separate pile organize your miscellaneous paper products. My grandmother was a fastidious record keeper. This means I am both blessed, with love letters from my grandfather and her neatly filled out tax records from her days as a teacher, and cursed, with stacks of hastily signed unpersonalized wedding cards and birth announcements of people I have never heard of. As you peruse through these, keep in mind what they contribute to the collection as a whole – whether it’s how hastily they wrote by hand, who they dated, where they travelled and when (yay postcards and stamps!), or hints of family relations from obituaries (for instance, my grandmother who had been married to my grandfather for over a decade was purposefully left out of her mother-in-law’s obituary).
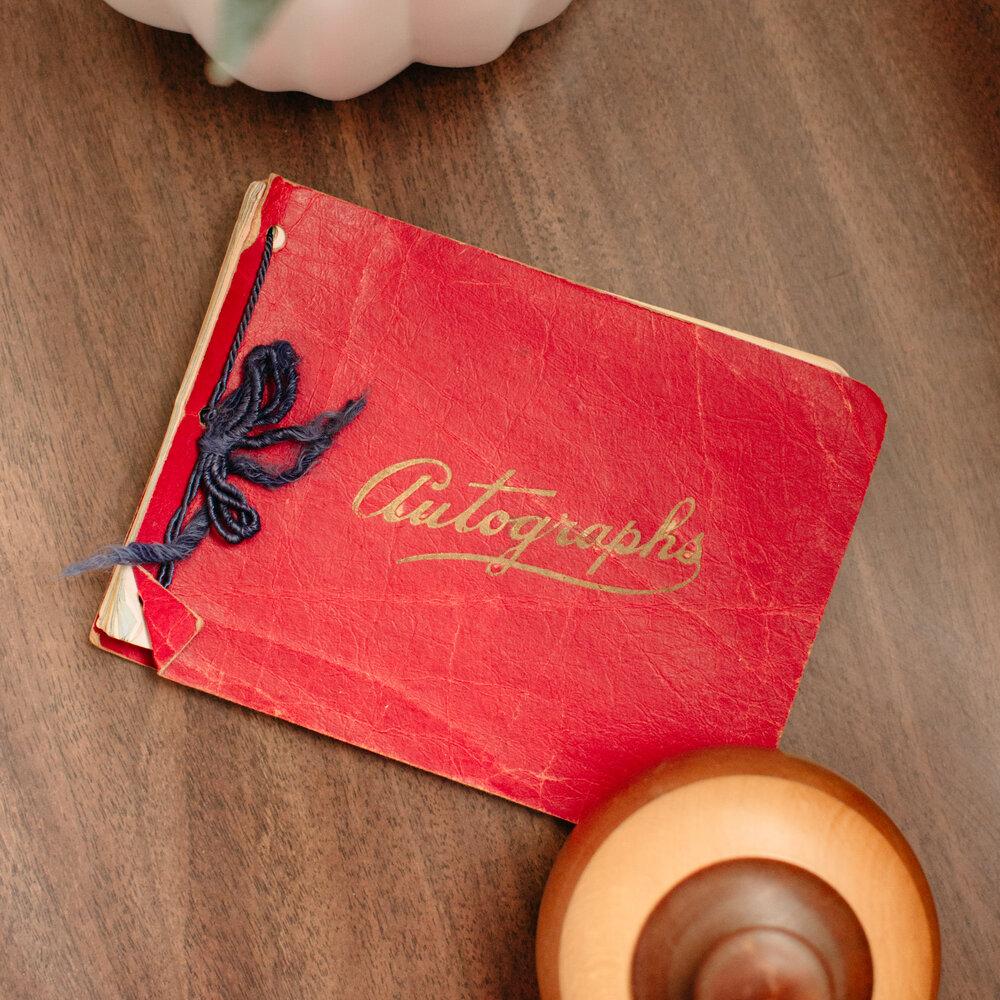
A autograph book from my grandmother’s 1944 school year. A favourite excerpt is:
“Dear Darlene, California girls are pretty, Harrow girls are nice, but when it comes to Darlene, Oh. Boy. She melts the ice. Your friend, Sophia W”
Slides
Your personal photo collection will come to colourful and brilliant life in the late ‘40s-90s if you are so lucky to have slides to delve through. Suddenly you’ll appreciate your grandmother’s taste in garden layout you emulate so wonderfully in Animal Crossing, that your grandfather’s shoes really were blue suede shoes, that your mother has been wrong all these years about that dress colour on her sixth birthday she mused so much about, or that the house you visited as a child was pink not ten years before. It’s a wonderful and fascinating world – unless your family’s slides were stored improperly or shot on Ektachrome of old (ugh! Where ever did the colours go!). We’ll delve into the delights and the frustrations that are slides later. But for now, know you have slides if you can look at it and distinguish an image as it looks in real life, that it is typically in a cardboard or plastic sleeve, and here is hoping for your sake, your family slides are in a carousel meant for a projector (but if not we will take a deep breath and go over that as well).
Word of warning for those of you whose slides are in carousels, if you are curiously looking through them return them exactly as they were (yes, upside down), and facing the same way as you took them out. Your future sanity depends on it.

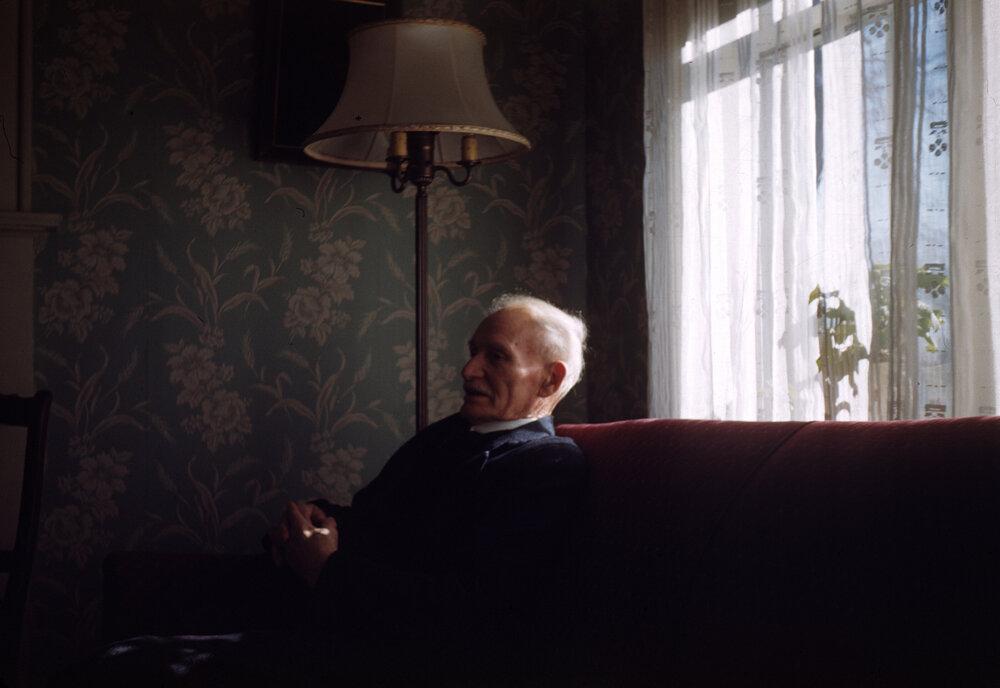
My great great grandfather, E.J Tofflemire. As taken by my grandfather, Bruce Staddon, on Kodachrome film in 1948.
Negatives
I have a confession – I dislike negatives. Rather, I dislike scanning negatives, particularly colour negatives. I will be elaborating more on negatives at a later date, but first I need to explore the process more myself in order to share with you. Just know, if you have both negatives and prints of the same images, for the best quality you may want to hold off on scanning the prints.
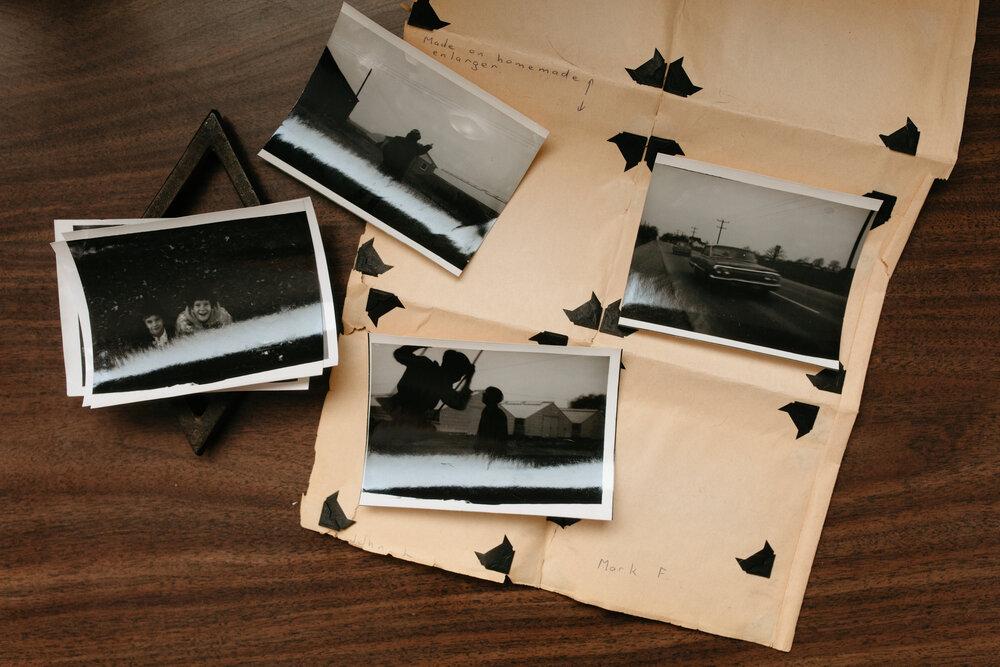
For instance a 14-year-old with a homemade enlarger may make a print from a negative, or, the very same negative kept safely in a sleeve 50 years later can be scanned to include all of the negative data.
Update: I no longer dislike scanning negatives and will be delving more into this shortly


Organizational Method
Before you delve into this, I need you to understand that determining how you will best organize your photographs for digitizing may be the most frustrating part of this entire process. No single categorization method works seamlessly for each collection, exceptions will need to be made, and rules broken. Take into consideration which method most broadly appeals to how you wish to experience your images afterwards – for instance, are you keen to see all the family vacation photos together, or specific family members, or perhaps have a visual chronological timeline of your family? Regardless, we will fine-tune the organization when scanning with keywords and metadata.
The first step is to familiarize yourself with your photographic collection. Take some time to pour through your images, ask yourself if there was a categorization method your family members seemed to follow, or note if they were mindful of writing dates or names on prints.
Depending on those factors chose a categorization method, whether it by year, decade, family grouping, or event.
Year or Decade
Pros: Visually appealing chronological timeline of your family, no confusion of whether it fits into one category more than the other
Cons: Additional images added after organizing may not be in order with the first batch (particularly if done by year)
Filename Example: Year_ScanOrder_Description (ex. 1956_0001_DarleneKarl.jpg for the first image of 1956 of my grandmother and father)
Categorizing by year or decade is my most highly recommended method. It’s easy to understand, images won’t fall into more than one possible category as it might by event or family grouping, and it is oh so satisfying to school through the passage of time and see your grandparents growing up, followed by your parent, and mayhaps even your own appearance into humanity. Perhaps your collection is well dated, in which case this will be a breeze. However, if you find yourself with a box of unlabelled images spanning the last century here are some tips to get you started.
Handwritten Labels
The most reliable source of dates. Check both the front and back of your prints, and both side of your slide mounts for annotation.
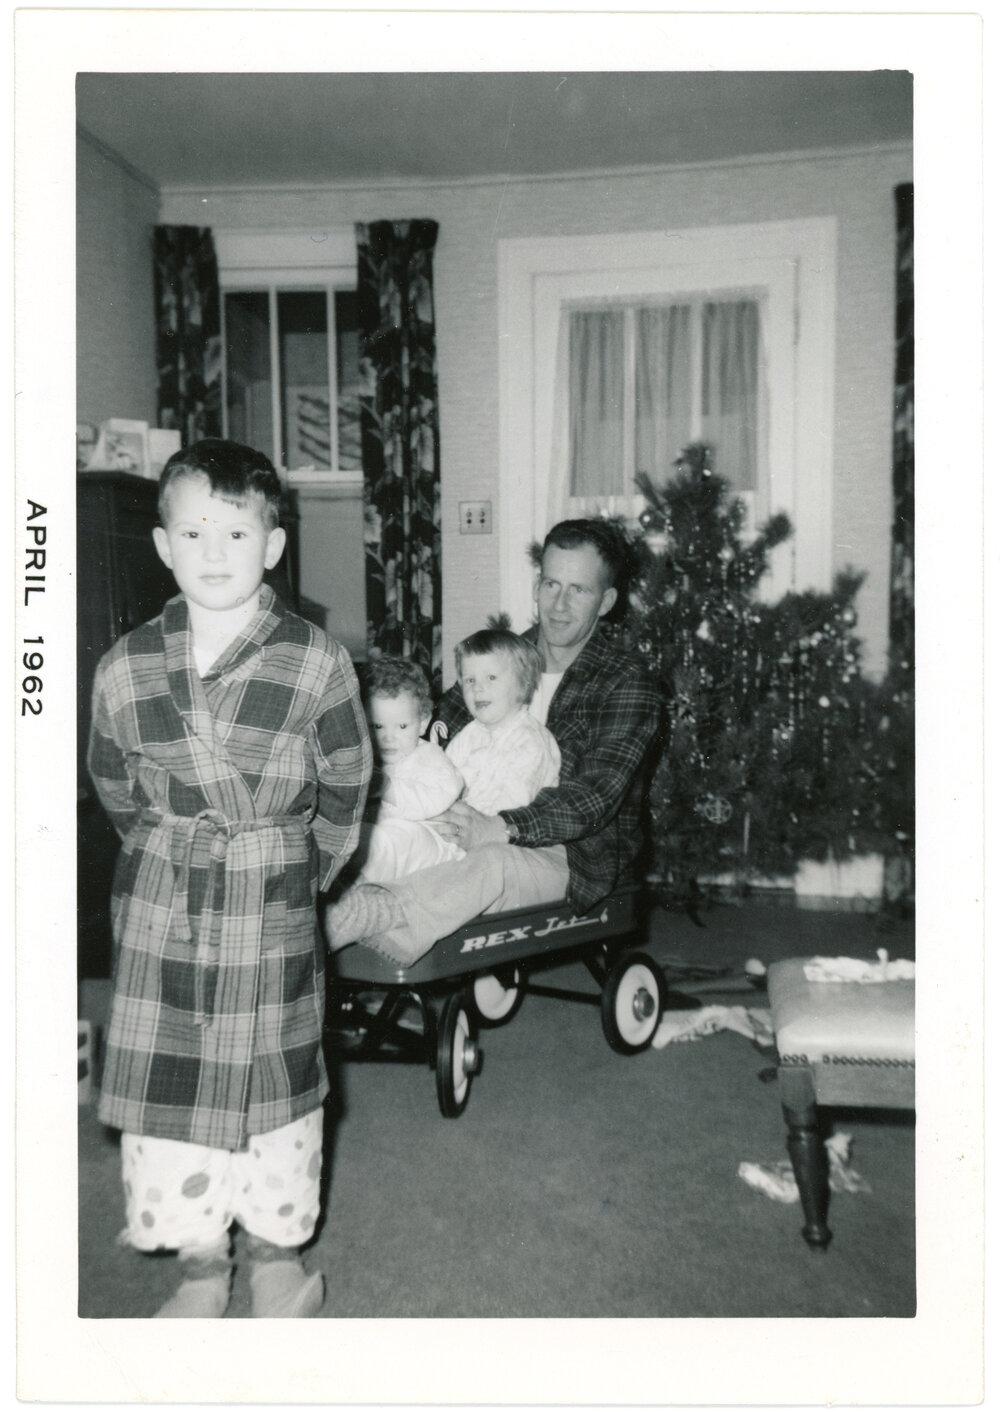
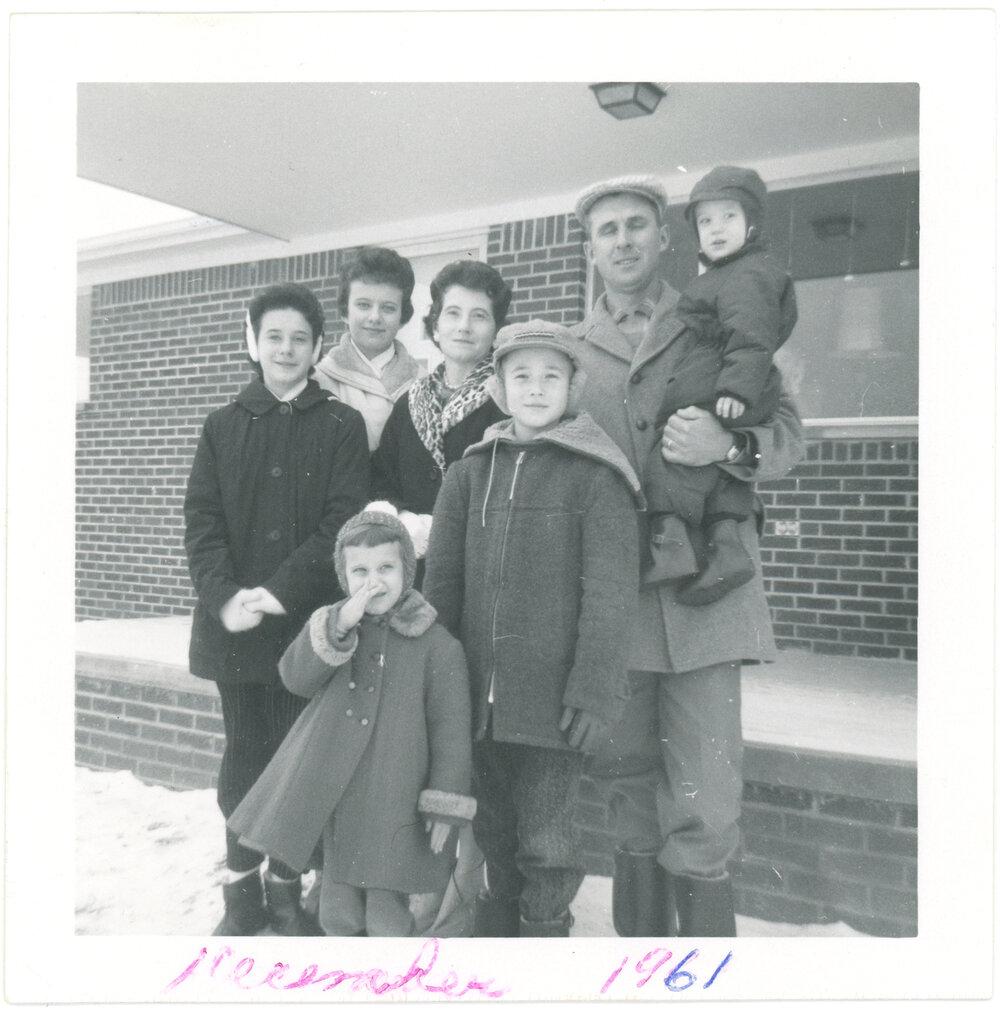
Lab Printed Labels
Most commonly seen following the 1950s is the inclusion of dates by the lab that developed the film or the print. On slides, this may be stamped on the cardboard or plastic mount. On prints, you may see it on the front around the edges, or on my recent prints included on the data on the back of a print.
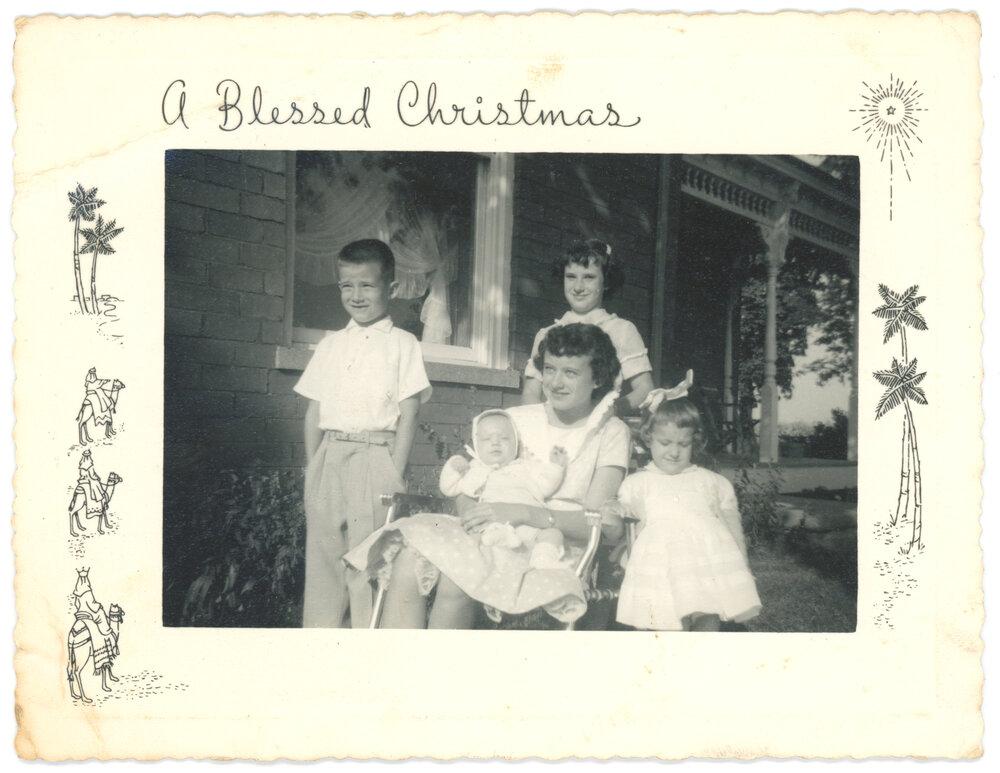
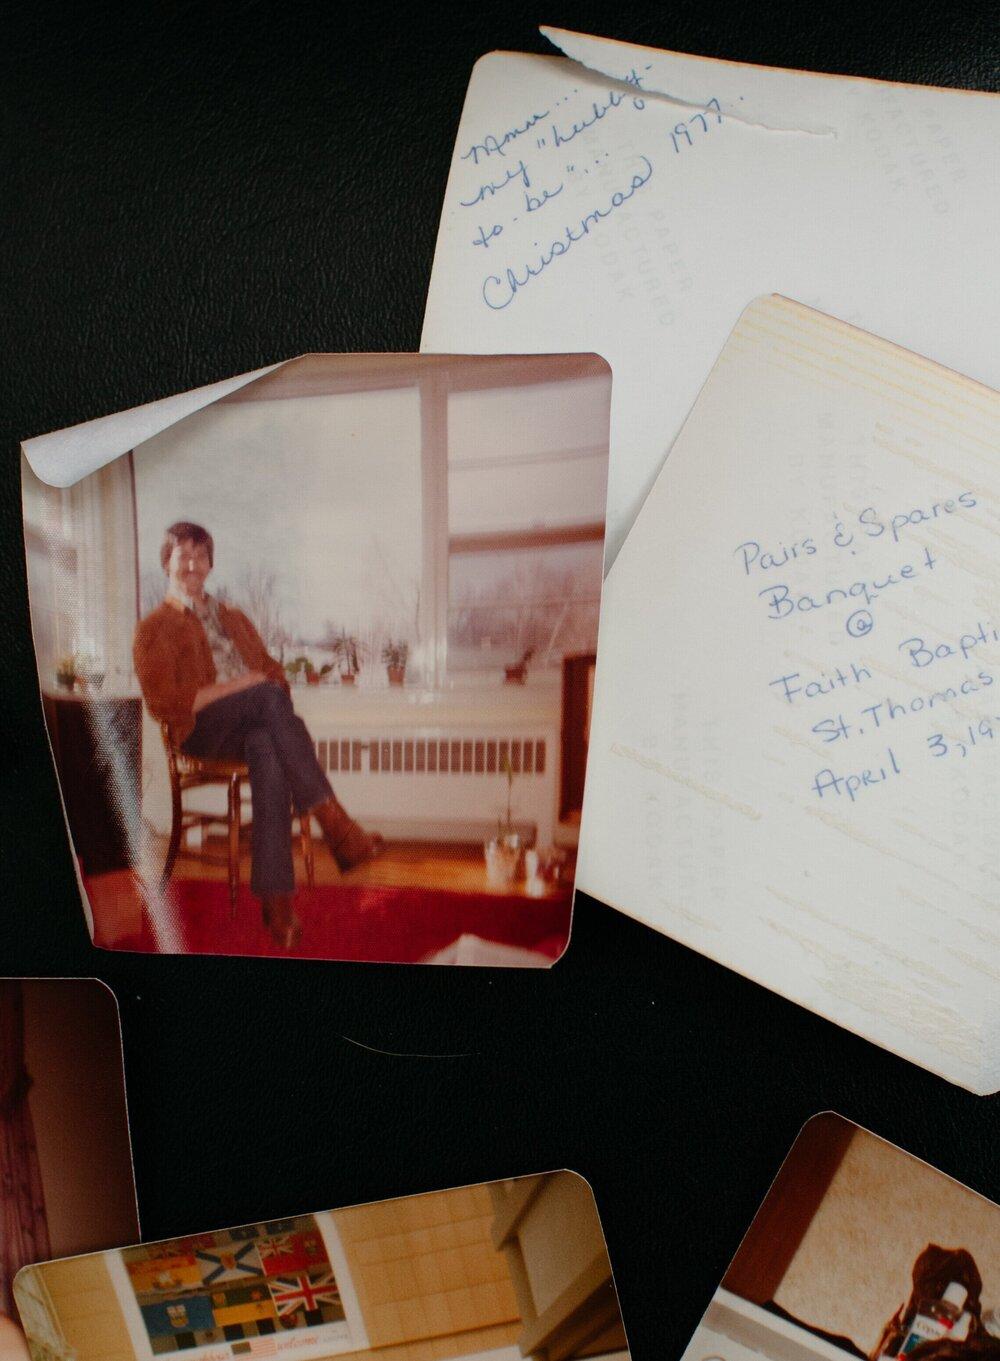
Note: These correspond to the date of development or printing. For this photograph of my father and his family on Christmas Day, I can presume December 1961 is the correct date and not April 1962, when it was printed.
Paper or Film Type
As discussed earlier under prints, photographs have had their popular times. You may be able to identify turn of the century images as daguerreotype, tintypes, or cabinet cards, to name a few, with each having a set timeframe of common use. Or perhaps the wavy photo edges of the 50s, the rounded corners or polaroids of the 70s. Of course, many of these extend outside of those decades but it helps narrow it down.
For slides, I have most commonly seen cardboard mounts anytime before the mid-80s, followed by the rise of plastic mounts.
Fashion
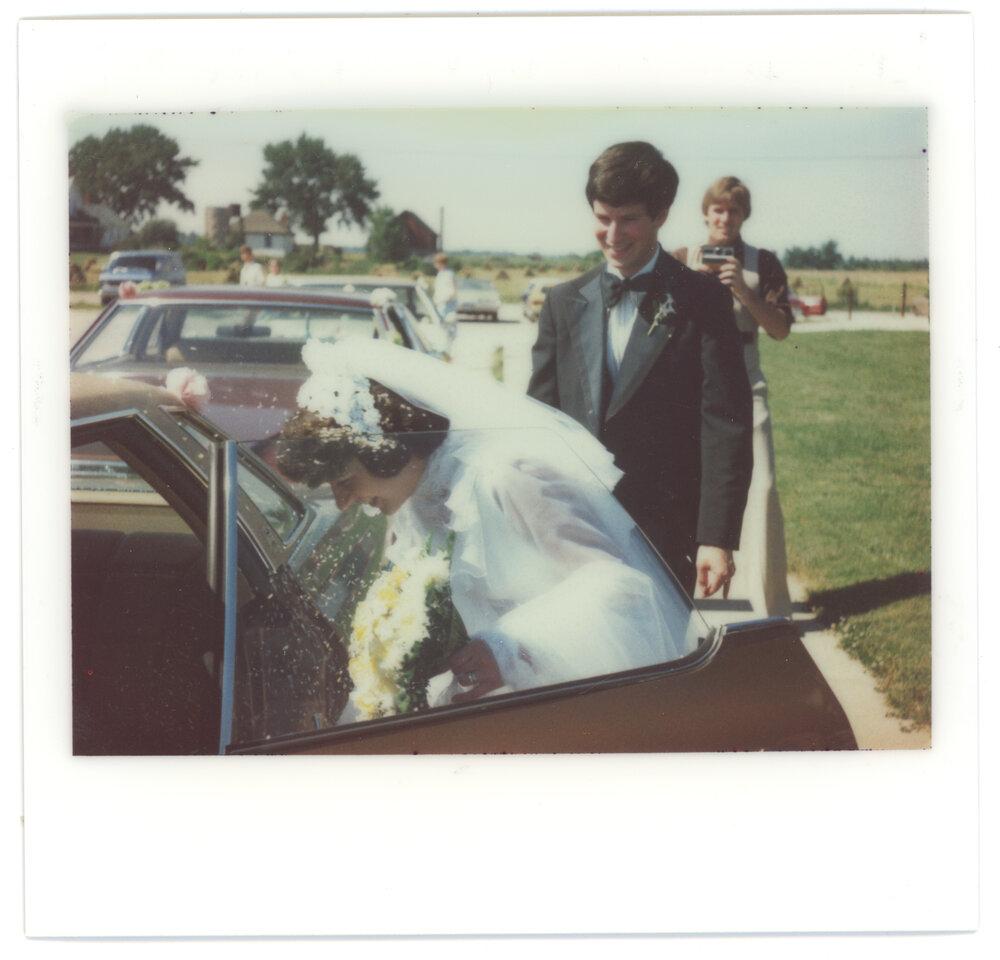
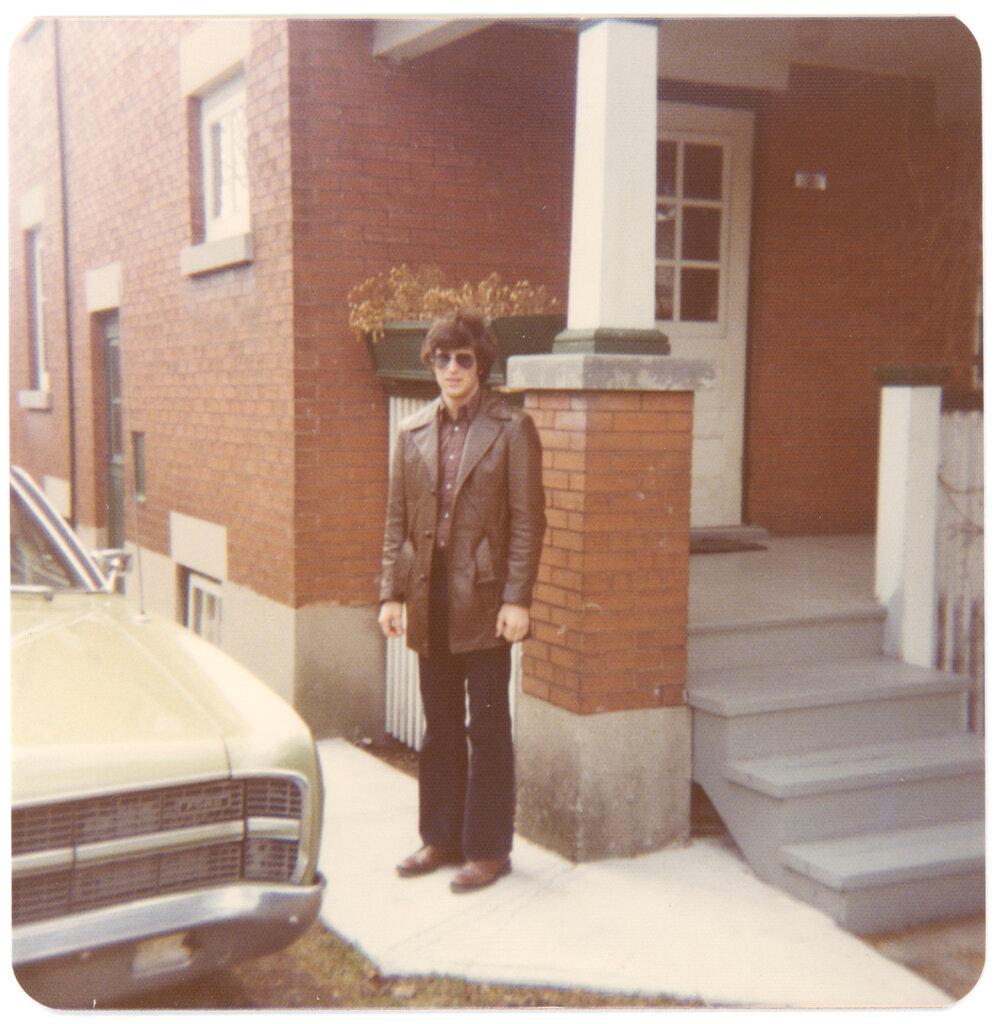
Quite possibly the most notable mark of a decade is fashion. Watch for the advent of zippers, the length and widths of ties, hairstyles, skirt lengths, the appearance of jeans and how much they flair. The colour palettes and patterns, wedding dress styles changing at an even more identifiable rate.
Don’t hesitate to ask a friend who is passionate about clothing if they can identify a style’s year.
Technology and Objects
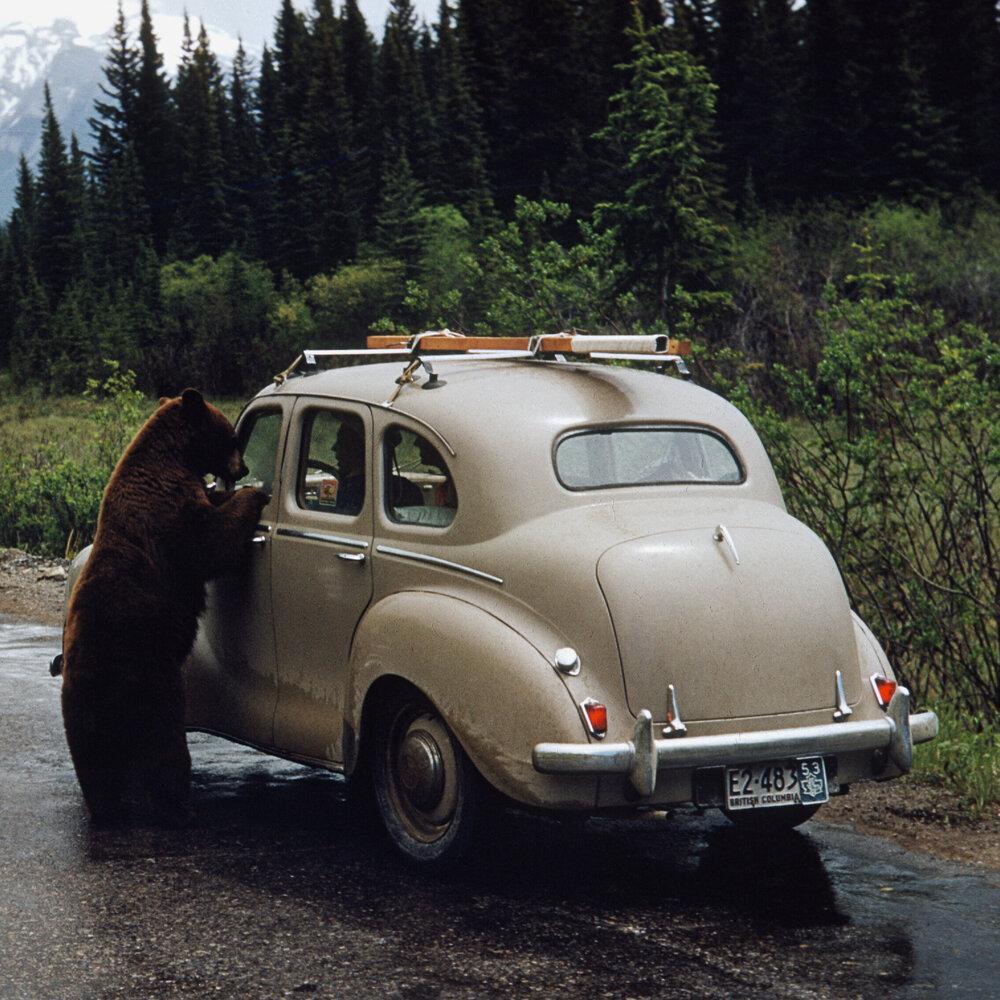
Here is where you get to go a bit more sleuth. You have the obvious, such as automobiles styles, but consider looking at the license plate (in Canada new plates were issued every year, this photo was taken in 1953). Photos in Canada that include the Union Jack rather than the Canadian flag were taken before 1965. Cameras, fonts, phones, record players, brands, and headphones are marvellous indicators of time.
Can’t quite ballpark the year by using any of the above? I’d recommend giving it your best guess of year or put them into an unknown decade folder. If you do the latter these photos will be denoted with a u for unknown following the last year of the decade. (Confused? No problem we will be going over this later).
Family Grouping
Pros: Easier to share groups of images with specific relatives
Cons: The conundrum of when two or more families are in the same photo,
Filename Example: CategoryNumber_ScanOrder_Description (ex. 02_0001_AuntElizabethFergusonChristmas.jpg for the first image of 1956 of my grandmother and father)
I like to think of this method as if your grandparent has decided to bestow upon all her children their photo collections. Your parent and every aunt and uncle get a shoebox (or twelve) full of images where they were highlighted, or that they would find more humorous or relatable. This method may work best if your family members are interested in viewing the family archive, but don’t want to wade through images that aren’t pertinent to them. Or perhaps if the imagined scenario has occurred and you will be receiving segments of the family archive in waves from each aunt and uncle.
The trouble with this method is when family groups overlap. Perhaps each child of your grandparents is given a category number for file naming. 01 for your family, 02 for your Aunt Elizabeth, 03 for Uncle Roger, and 04 for Uncle Timothy. But what happens when Uncle Timothy and Aunt Elizabeth’s children are posing in front of a park sign – does that go into 02? 04? A new 05 category? You make the rules!
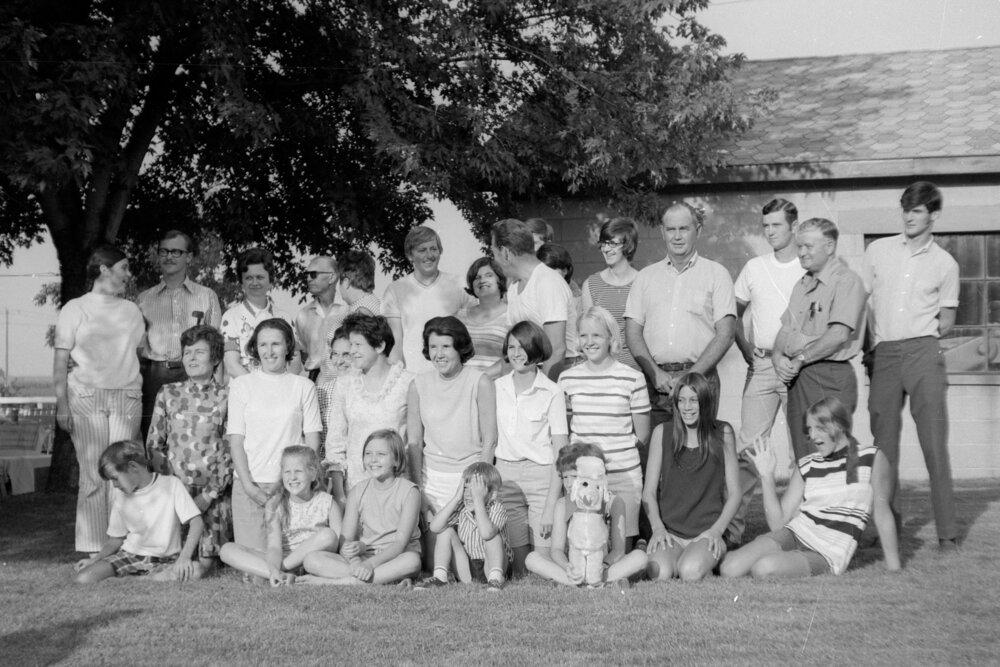
Staddon family picnic c.1970
Event
Pros: Quickest method for a small collection, easier to find keyword specific images
Cons: The conundrum of when two events coincide
Filename Example: EventNumber_ScanOrder_Description (ex. 04_0001_RogersChristmas.jpg for the first image of a Rogers family Christmas)
Events may be determined as vacations, holidays, home life, work etc. I recently scanned perhaps forty images for a family. The images were taken in the early 1940s, the dates weren’t known on all but a handful of prints, and the easiest way to sort the images was by the primary subject’s work life, and his personal images. Similar to family photos, the grey areas of where to put photos that may fall under two categories may arise, so I would not recommend this method for extensive collections.
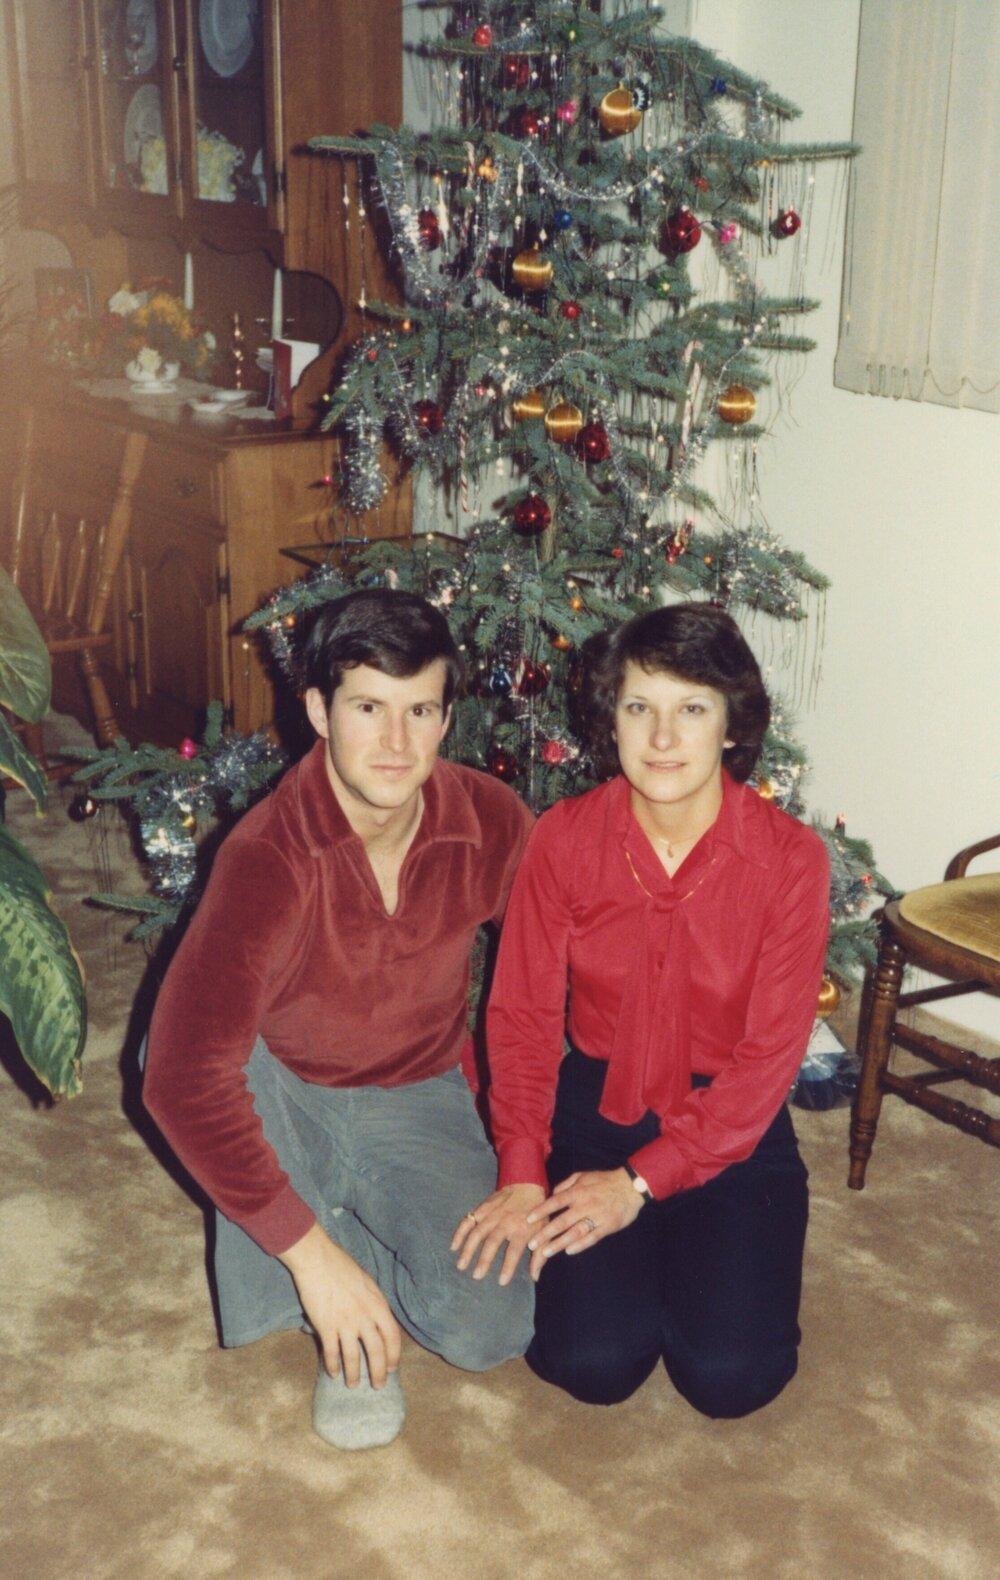
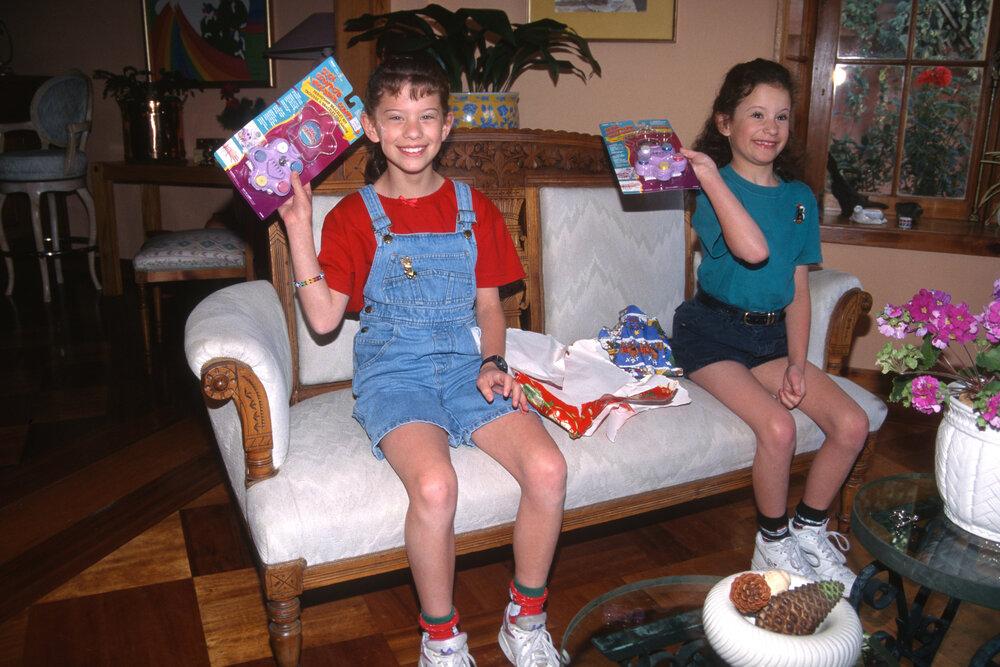
Christmas photos across the years.

Image Sorting and Preparation
Steps
Here is a brief overview of what you will be doing with your images prior to scanning to streamline that process, as well as archiving your images afterwards. Consider this a guide and not an absolute, each collection may require some tweaks.
-
Separate your collections by family. All of my father’s family images were done at one time. All of my mother’s family images were completed at another time.
-
Separate all prints, miscellaneous paper, slides, and negatives. You will be dealing with each type separately. Exception: If your negatives are packaged with their corresponding prints do not separate them from each other.
-
Remove prints from albums. Unless you know your family albums are acid-free, lignin-free, and PVC-free, they should likely be removed. You may want to hire a professional archivist or photograph conservator for this. Exceptions are made for particularly stubborn albums, mounted photos, images in cases such as daguerreotype and ambrotypes etc.
-
Sort prints by the determined organization method.
-
Keep slides in their carousels, or if you have loose slides arrange them in slide boxes. I’ll say this at least a dozen more times if your slides are in carousels, when looking at your images put them back in the same orientation as you found them.
-
Negatives. At this time I won’t be delving into negatives but will come back to them at a later date.
-
Remove duplicates or inconsequential photos. This may be done in the sorting process or when scanning, but in short, you are going to lightly KonMari method your photo collection.
-
Scanning time!

1. Separate Family Collections
Well, this one is easy to understand. Rather than compiling two completely unrelated storylines, keep them separate. It will make for sharing with the respective family members easier, as well as keywording and overall flow. I chose to first digitize my father’s family’s collection, followed by my mother’s, and am currently working on my own family photos from my own childhood.
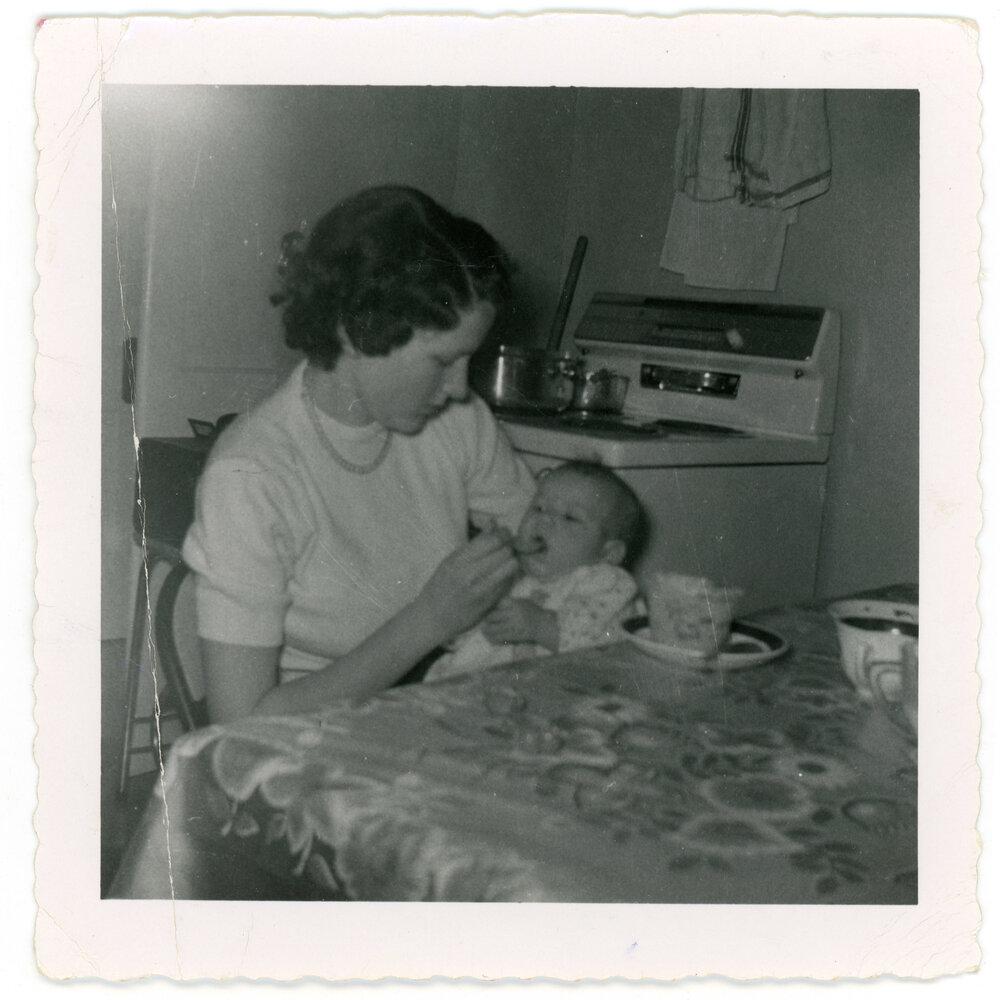
My father and his mother. 1956.
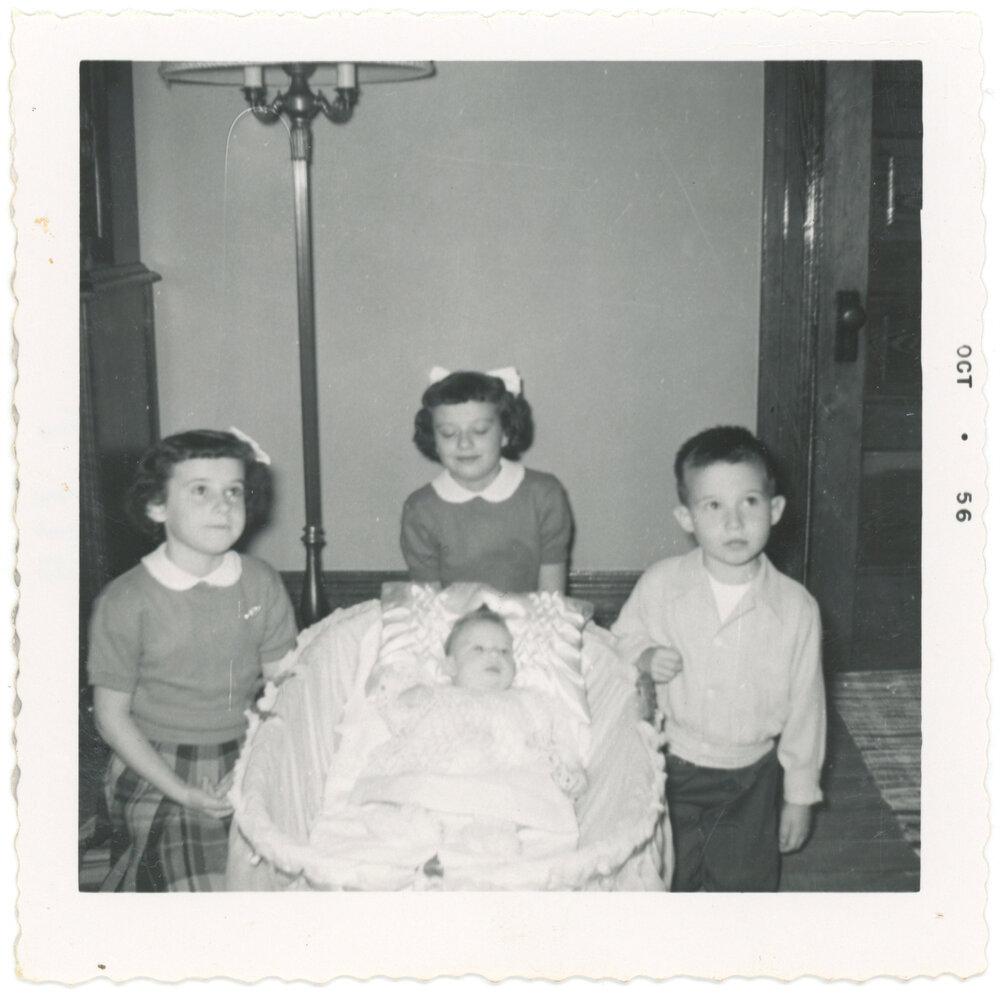
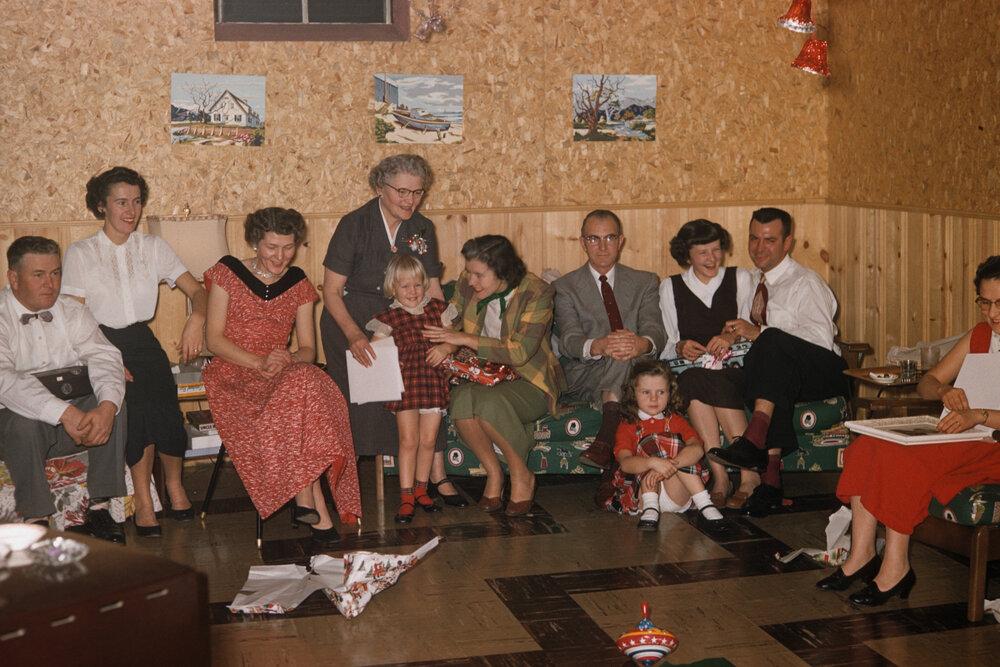
My mother and her siblings. 1956.
2. Separate Prints, Miscellaneous Paper, Slides, and Negatives.
Each medium has a different scanning method and settings, so this is to streamline your process and optimize time. Our first project will be prints, followed by miscellaneous paper items (letters, cards etc.), slides and finally negatives (which is a subject I will be working on in the future).
If there are letters that specifically correspond to a photograph, or your negatives and corresponding prints are packaged together, do not separate them.
3. Remove Prints from Albums
You’ll probably notice if you have images older than the 90s that the colours have faded or shifted. This may have been caused by chemical change in the printing materials themselves, or from the surface on which they are mounted or stored. I simply assumed my family albums were not considered archival-quality with acid-free, lignin-free, PVC-free materials and resolved to remove them for better storage. Acid may come from the adhesives, tapes or plastic covering, lignin is an acid that naturally occurs in paper products, and PVC is a low quality plastic that is unstable and will deteriorate, damaging your prints. Here is a quick guide for whether you should remove prints from albums
Do Remove: Slip in photo albums, magnetic page album (more recognizable as self-adhesive pages with the plastic that flips on top), paper page albums where photos are fixed with four corner mounts, photo lab envelopes (yes, even those old glassine paper/waxy cases from the lab are not great)
Do Not Remove: Professionally mounted photos such as cabinet cards, brittle images, really really ridiculously old images that aren’t budging, images in cases such as daguerreotypes and ambrotypes
Slip in Albums
Congratulations these are among the easiest to remove! No words of advice here other than to maintain the order they were sorted in as you remove them.
Magnetic Page Albums
Someone back in the 70s plotted to make our lives miserable with self-adhesive pages with flip over plastic covers. Images from the late-80s onwards I have been able to remove problem-free, but earlier versions may feel they are nearly cemented to the page.
If you notice any creasing in your images or feel even the slight bit of tearing stop and watch the Smithsonian’s video on how to remove images using dental floss.
Three albums of my mother’s from the late 1970s were magnetic page and it was impossible to remove the images by hand alone. I removed over one hundred images using the dental floss method successfully with only a handful of errors. Each one could have been prevented with a bit more patience and care.
On the top image, the floss caught on the edge of the photo causing the paper backing to tear – the photo was unaffected and scanned perfectly fine. You will feel added resistance if it catches, stop, start from another corner and try again.
The image with the curled corner was one of my first dental floss experiments. I had started at the bottom right corner, got to the middle of the image, and believed to have sufficiently removed the adhesive to be able to remove the rest by hand. Unfortunately, much of the paper remained on the album page rather than the image. Once again the scanned image was fine, however, the image is more prone to creasing and I lost some handwritten information on the back. I’d recommend removing images completely while using dental floss.
Lastly, you can see the paper and adhesive damage on the back of the Pairs & Spares print – this will continue the slowly degrade the images, but the earlier it is removed from the album the better.
Paper or Cardboard Albums
There are a few different varieties of this. If you are fortunate, your images will be held by (or more likely half falling out of) four corner mounts. These allow for easy removal of the images. My 14-year-old father had a scrapbook using the four corner adhesives of his darkroom experiments, with notes scrawled below. I removed each of the images in order, and when I scanned the images referenced the scrapbook writings to include in the metadata. I kept a page of the scrapbook to remember his scribblings.
Other paper product albums may use an adhesive of who knows what variety. Some may be able to use the dental floss method mentioned previously to remove the prints. However, if the images are too brittle or far too stuck, don’t damage the image in your efforts to remove it. Alternatively, archivists recommend leaving the page as intact as possible and scan the image as is. Another possibility is to cut out the photo with the paper still adhered in order to place it into a more stable archival environment after scanning. None of my personal family albums allowed for this since photos were on both sides of the page.
Mounted Photos
Don’t remove your photos from their mounts, regardless of the condition. This should only be done by a conservator.
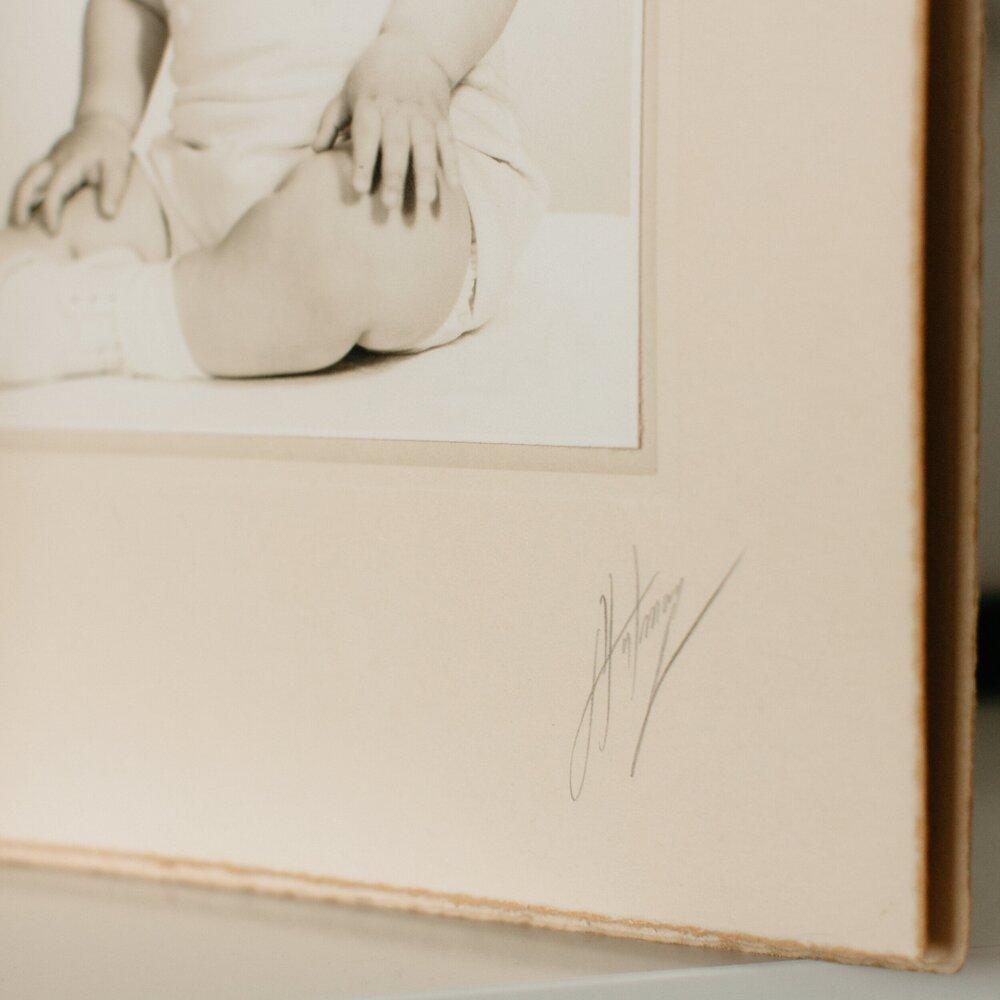
It’s likely that on special occasions your family went to a studio in their city to commemorate the event with a photograph. The card stock quality tends to be better than consumer quality, and oftentimes there is useful information such as the studio location and date.
4. Sorting Prints
At this time you’ll have stacks of loose prints.
If you have a small number of prints (perhaps a shoebox or two worth) this can be a single day step and all you need is the space of a dinner table and some sticky notes or paper to write your categories.
If you have a large number of prints this will be a multiple-day project so you will need either individual file folders, a bankers box, or shoeboxes to keep your prints organized and easy to set aside when you aren’t working on them.
I will be focusing on the chronological organization method but tweak as you see fit if you want to organize by family grouping or event.
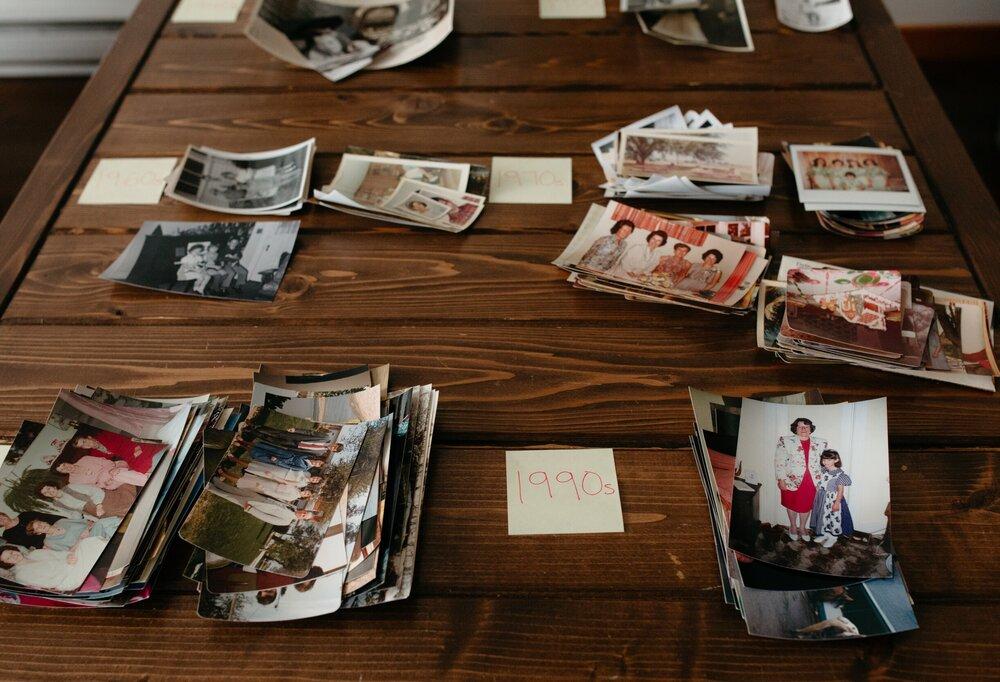
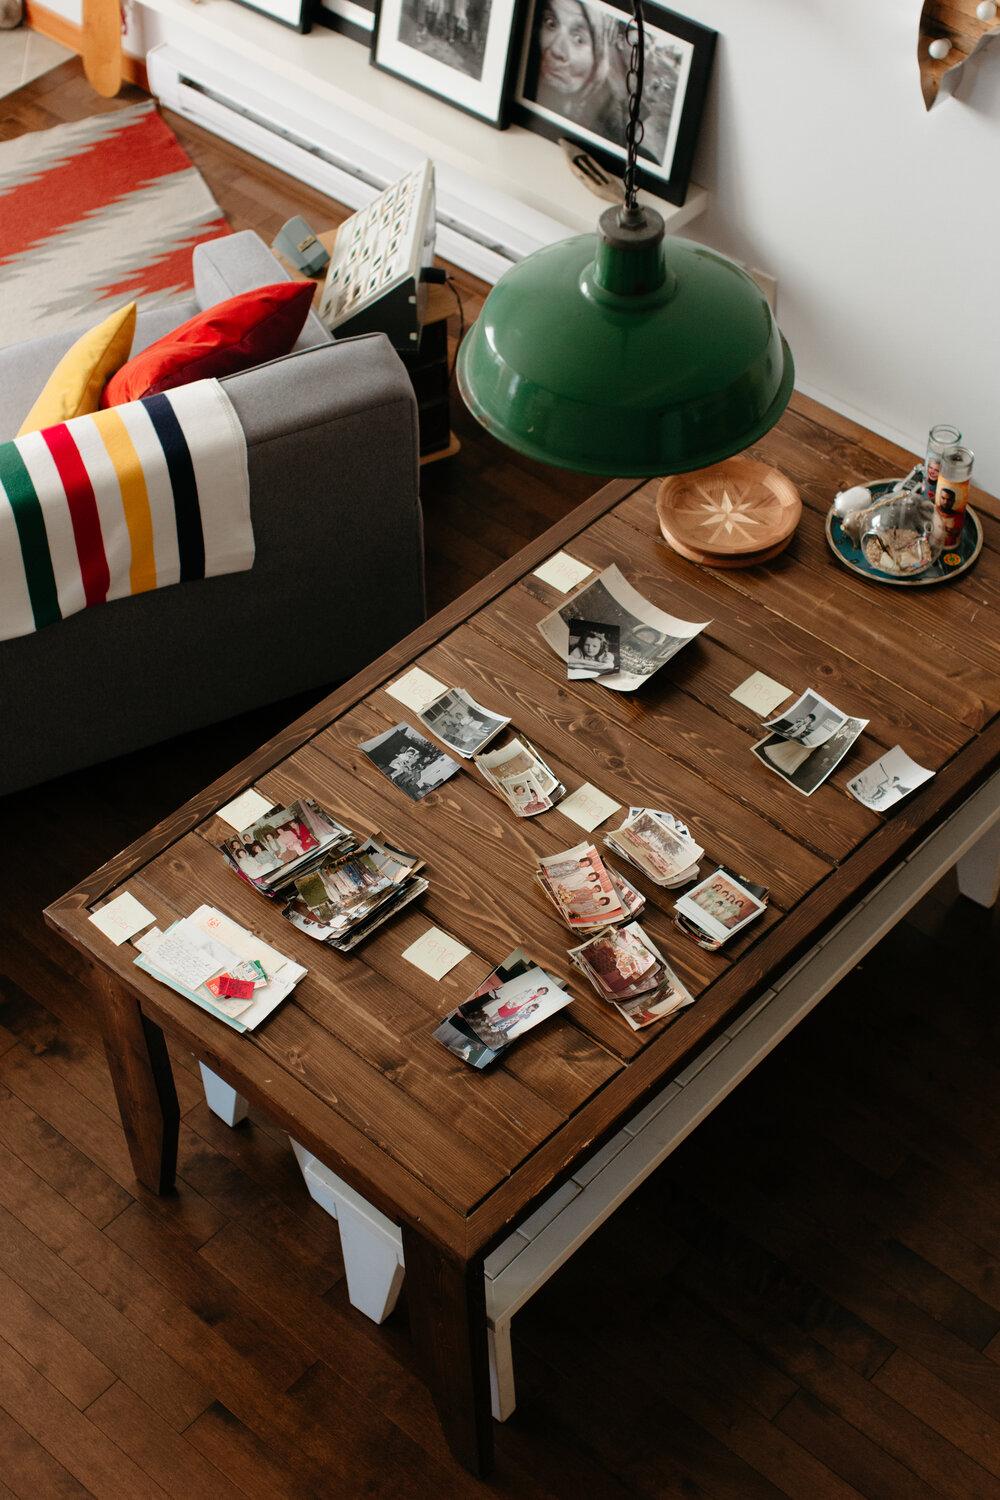
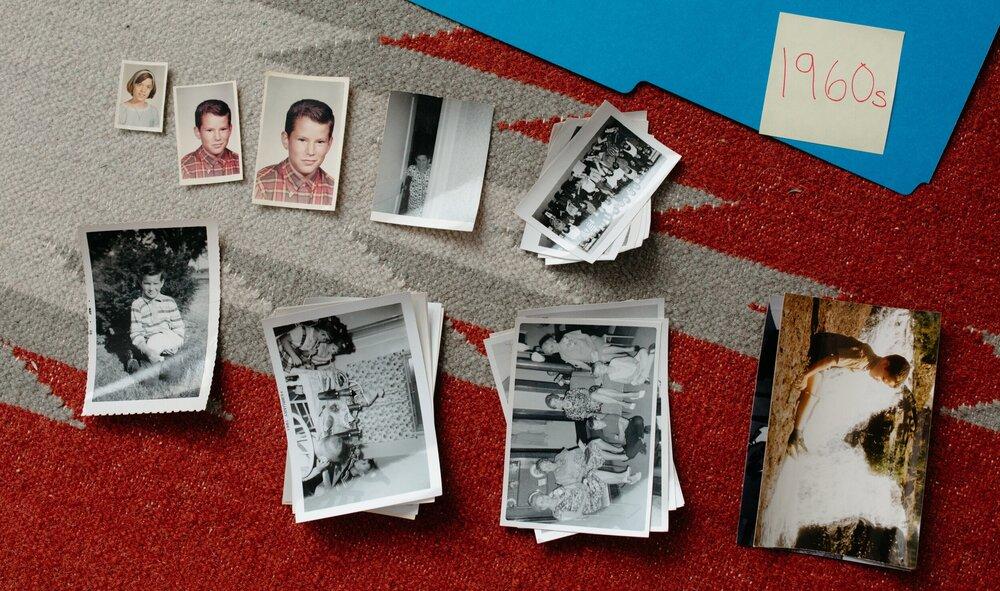
Start by labelling broad categories. My first sort I did by decade and had an additional pile for miscellaneous paper (reminder: if there is a corresponding image, keep the two items together), as well as school photos. This should be quite easy using the date indicators mentioned above. Don’t worry about the photo orientation and as piles start getting higher feel free to start new piles.
The second step is to fine-tune for scanning. If you are organizing by decade only (or family grouping/event), take your broad categories and arrange them by image size, from smallest to largest. Pile them so the smallest is at the front and largest is at the back. The reason behind this is because you’ll be changing your dpi depending on image size when scanning so you’ll save time later. (If you don’t understand, don’t worry, we will go over dpi later.)
Repeat this for each of your broad categories and set aside. You are now ready to scan.
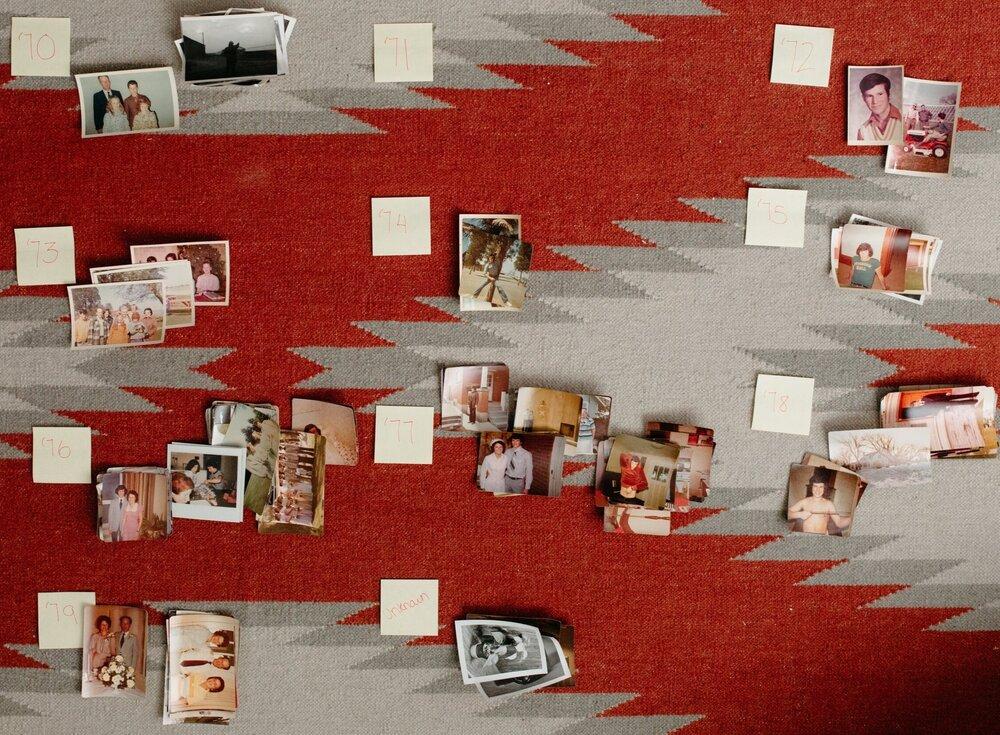
If you are sorting by chronological order, create yearly categories (or if you have a lot from a single year you could even do it by yearly season or month). Do you know the decade an image was taken but not the specific year? You may either guesstimate which year it falls into place it there, or create an unknown category. The unknown categories will be scanned last in that decade. We will not be organizing by size for this method. When done stack your images with oldest at the front oldest at the back (ex. January 1970 at the front of the pile and December 1979 at the back of the pile). We are now ready to scan.
For your miscellaneous paper pile, arrange them by date. We will scan these after all the prints have been digitized.
5. Preparing and Sorting Slides
Give a little shout out to your relatives if you are given a collection of slide carousels that are both well labelled in content and date.
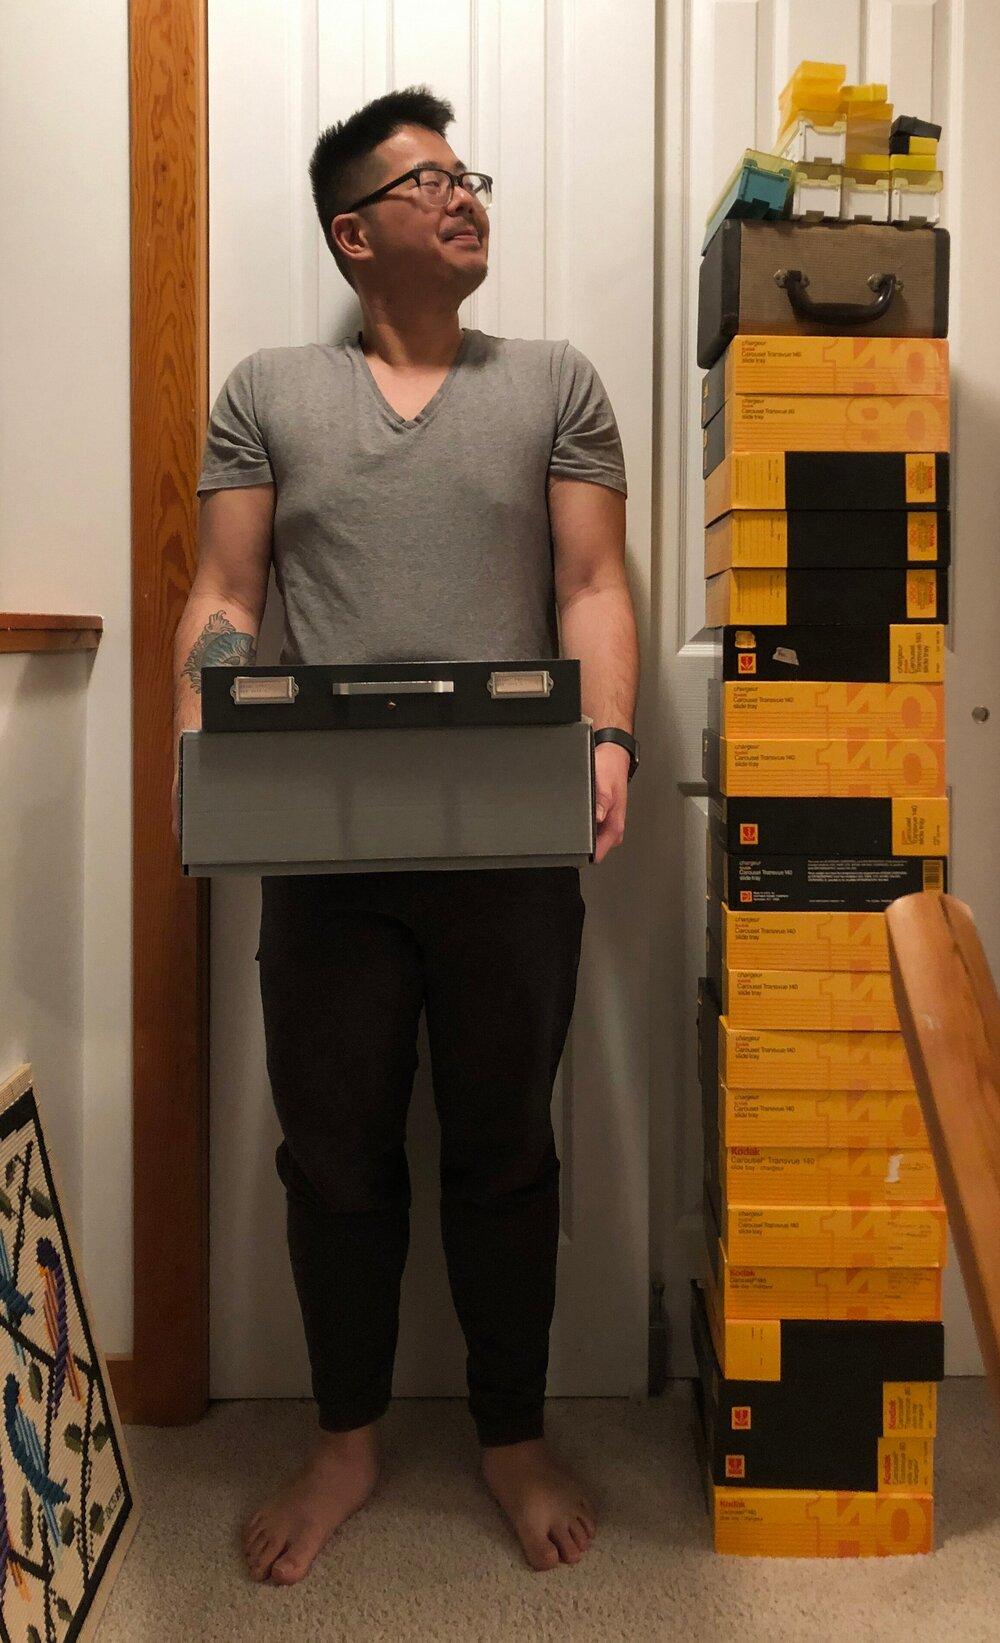
Now before you get too excited and start pulling out images to hold up to a window and inspect, perhaps multiples at a time, and forget where they went, or which direction you pulled them out, stop. Seriously, speaking from experience, this extra caution will save you hours of work digitally flipping images later. For reference here is my husband standing by the near two dozen slide carousels of my grandfather and father’s slides, of which several in my excitement in 2013 were completely muddled up by the time I started scanning.
If your slides are in carousels, and labelled, sort the carousels by ascending date. If your slides are in carousels and unlabelled, carefully remove a handful of slides from the carousel, one at a time, using tweezers, to inspect them using a slide viewer and see what time period each is from (using the organization time cues in the previous section). Arrange the carousels in the best-perceived order.
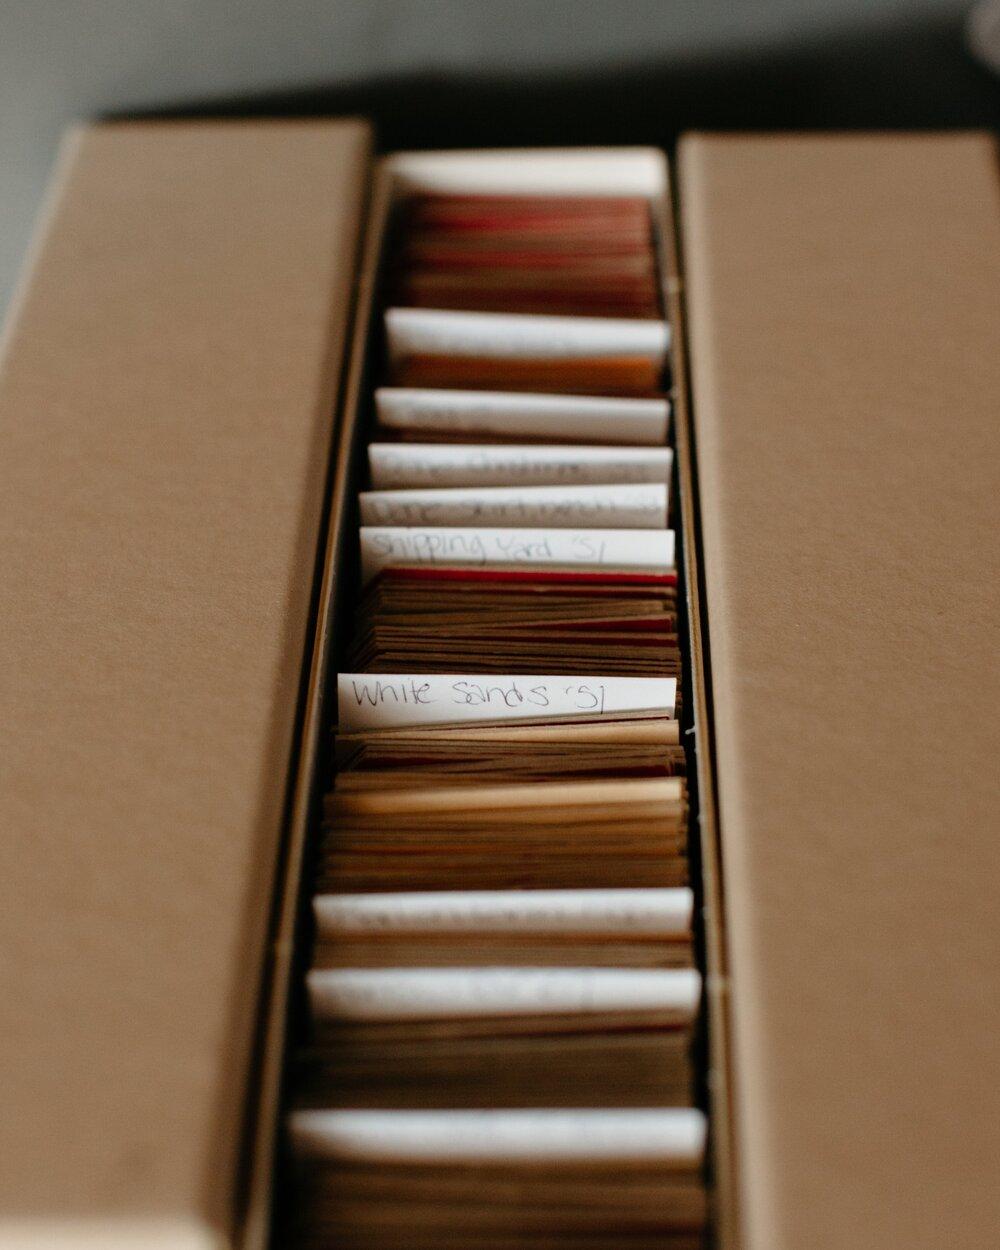
Are your slides not in a carousel and just a mishmash in a box? Let me start by saying, I am sorry to hear that, but, don’t worry the time and trouble taken now will pay off in the end. I would recommend purchasing archival-quality 35mm slide boxes and dividers (I use Archival Method) – ultimately this is what I will be recommending for storing your slides after scanning so you may as well get one step ahead. In addition purchase a backlit slide sorter.
On the paper dividers note each category at the top, whether it be individual years, or trips, or family. Select twenty or so slides, place them on the slide sorter and begin putting each slide in their respective category. It will be a slow and methodical process but ever so slowly the pile will become more manageable.
6. Preparing and Sorting Negatives
I am honing in my process on both negative sorting and scanning at the time. When I’m confident in a process I will update this section.
7. Duplicate Images and Inconsequential Photos
Let’s just all admit we aren’t great at self-editing our own images. Neither were our relatives. So it’s likely as you organize your photos you’ll be coming across a lot of images you may not feel particularly connected to. The most important deciding factor on whether to keep and/or scan an image is how it contributes to your family’s visual narrative. This step can be done either when organizing or as you scan.
Duplicate Images
If the size varies, keep the largest of the two for scanning. If they are the same size, inspect each carefully for any differences, for instance in cropping or colour, or damage.
Inconsequential Photos
These may be photos without context or are uninteresting. In my experience, these were primarily landscapes and macros. My great grandfather took a lot of roadside landscape photos, but most of them were poorly composed and unlabelled, and I knew I wouldn’t miss them if I lost the slides in the future. My grandmother had a thing for florals and photos of her garden, I scanned a handful since they spoke to her skill in gardening but the majority I retained the hardcopy without digitizing them.
Toss or Not
In most circumstances, I would urge you to keep the hardcopy of the images and simply forgo scanning them in the interest of saving time. However understanding there may be storage space constraints before tossing the unselected images, consider if it would be wanted by another family member or if it should be kept for redundancy.
Rules on What to Scan and What to Not
My personal guidelines were to scan every image that had identifiable people, signs (shop, street etc.), identifiable landscapes, and those that contributed to the visual narrative.
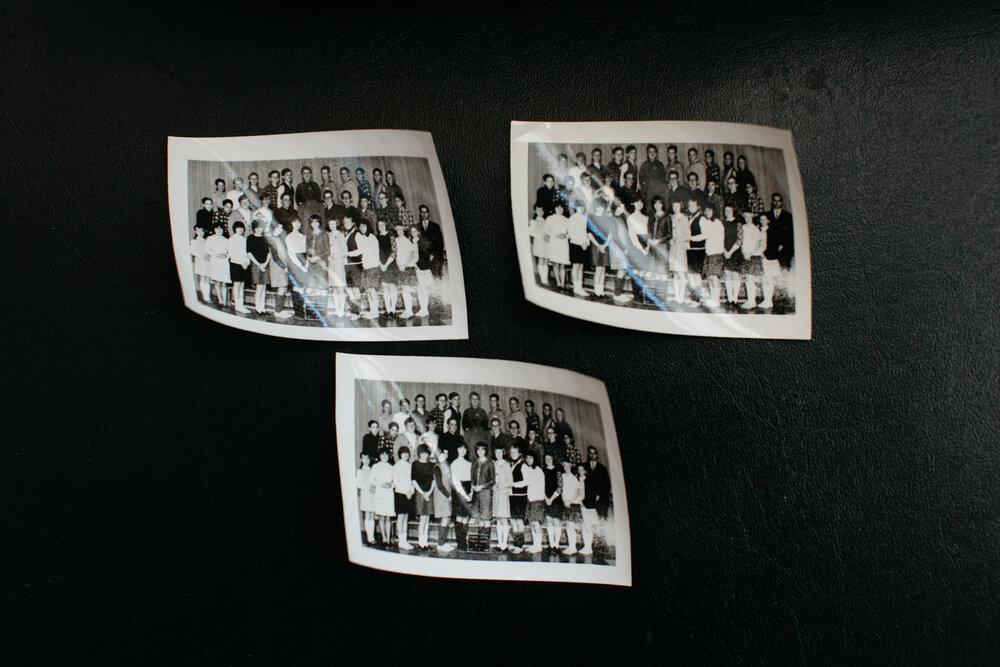
Three near identical darkroom prints of my fathers. I scanned the bottom as it had the ever so slightly better crop.
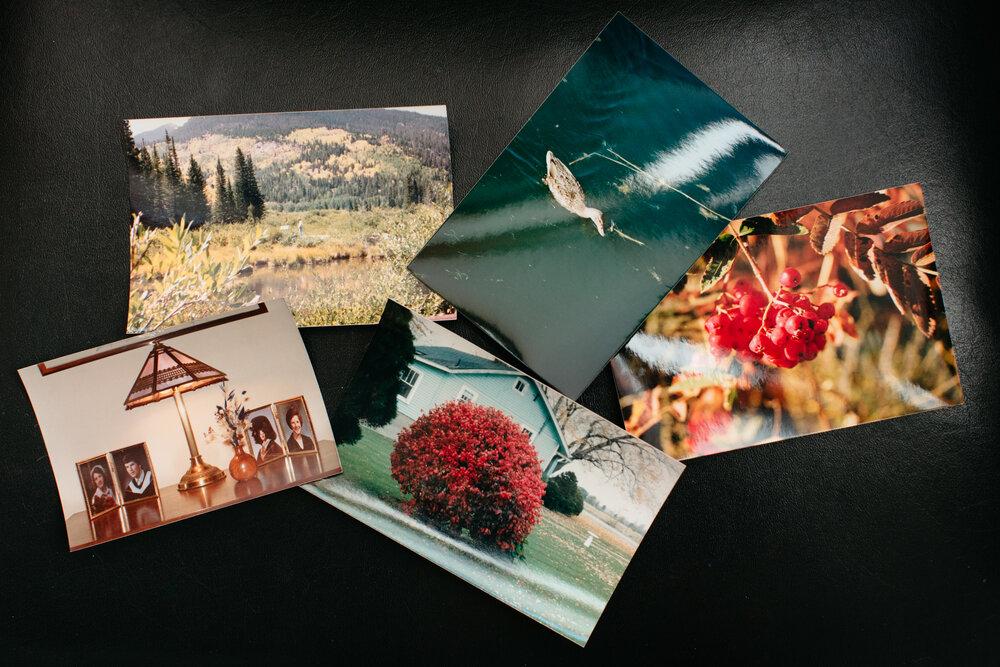
Landscapes, berries, birds, and tablescapes – all of which I wouldn’t’ miss if they disappeared.
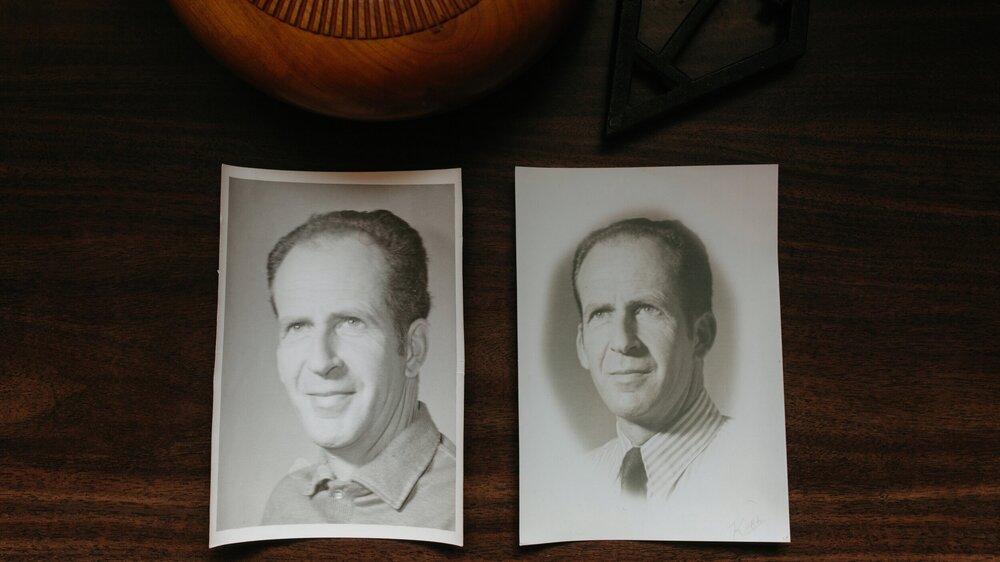
If I had to chose between scanning these two images I would scan the image on the right. It is sharper (hard to tell), and has my father’s signature in the bottom right corner (also hard to tell). Of course I scanned both because I have a penchant for keeping all the things.
8. Scanning Time
Yay! Congratulations you are now ready to scan your images!
Next up I will be sharing what to look for when purchasing a scanner, possible softwares to use. Follow on instagram to see updates.